A good presentation impresses with more than just written content. Graphs, diagrams, graphics and even videos can provide additional visual aid. Furthermore, transition effects and other animations can bring a presentation to life when used properly and in moderation. But that’s not everything!
In addition to you talking, audio files such as music and sound effects, recordings and other clips can help you to get your point across! In this article, we explain how to insert an audio file to a presentation and how to solve most problems you may encounter!
All About Embedding Sounds And Music In PowerPoint Presentations
Which file formats can be added to a presentation? How big can the files be? What’s the difference between embedding and linking?
These questions and more will be answered below!
1. Consider The File Format
Most audio files, nowadays, are saved in the MP3 format. They are relatively small in size, maintain acceptable quality, and can be played by almost every modern audio player – software or external.
Problem:
Older PowerPoint presentations only allow the embedding of WAV files.
Solution:
Convert your MP3 (or FLAC, OGG, AAC, etc.) files to WAV.
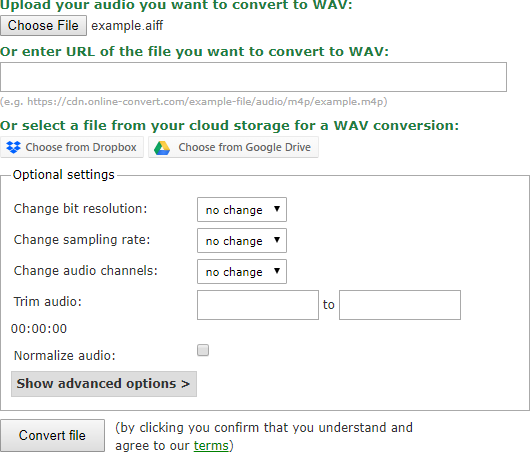
Since only WAV files can be embedded in a PowerPoint PPT or PPTX file, you need to turn your MP3s or other audio files into that format. This can easily be done by converting to WAV using a free online .wav converter.
Simply upload your file, click on “convert file” and the converted WAV will be downloaded on the next page. In some browsers, you might have to confirm the saving first.
In newer versions of Microsoft PowerPoint, the following common file formats should be supported as well. It may happen that all files but WAV files are linked instead of embedded though (see below). If this happens, you can still use the conversion method above:
- AIFF
- AU
- M4A, MP4
- MIDI, MID
- MP3
- WAV
- WMA
- Source
2. How To Embed Sounds & Music In A PowerPoint Presentation
Adding sounds or pieces of music to a presentation is quite easy and intuitive. It works almost the same way whether you are using Microsoft PowerPoint or one of the open source solutions such as LibreOffice Impress. The labels may vary slightly.
- Click on “Insert”
- Click on “Movies and Sounds”
- Click on “Sounds from File”
- Browse your hard drive for the sound or music file
- Confirm
3. Embedding vs. Linking
There is a difference between embedding a file in the presentation itself and linking to it. If the file is embedded, you can share the presentation or take it with you on a USB drive and the sound will still play. Linked sound files, however, need to stay in the directory the link refers to in order to be played.
To make sure that the audio file is actually embedded, follow these steps:
- Right-click on the audio icon
- Select “Edit Sound Object”
- Check the “File” section
- A path indicates that the file is linked
- The notion “[Contained in presentation]” indicates that the file is embedded
You can also change the PowerPoint settings so inserted audio files are automatically embedded and not linked. For that, have a look at the following section.
4. Consider The File Size
As with everything, there is a maximal file size allowed to embed audio files in your PPT or PPTX slideshow. Files larger than this file size either throw an error or are automatically inserted as links rather than embedded. The file size ranges from minimum 1 KB to maximum 50 MB.
You may have to change this file size restriction in Microsoft PowerPoint’s settings in order to embed larger files than the default (usually 100KB).
- Click on “Tools”
- Click on “Settings”
- Go to the “General” tab
- Change the value of “Link sounds with file size greater than” to 50 MB or 50000 KB
- Click on “OK”
Problem:
File size is over 50 MB.
Solution:
Reduce the file size via conversion.
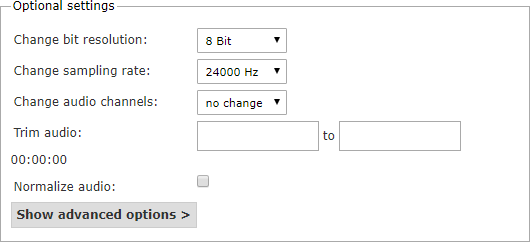
Remember the WAV converter from above? It can also help you to reduce the file size of your audio so it can be embedded. For this, you need to find out the bit rate and/or sampling rate of your file. You can do so either by right-clicking on the file and choosing “Properties”. The values might be displayed in the “Details” tab. Or you can upload your file to a service like Get-Metadata.com and check the information of your file there.
Once you know the bit rate or sampling rate, you can use the optional settings of the WAV converter to reduce those values. This also affects the quality of the sound file, but you can try to find the best compromise between file size and audio quality.