Your iPhone is more than just a device for texting and calling; it’s a powerful tool capable of capturing stunning video content. But to unlock its full potential, you need to optimize its settings. Find out the best video settings for iPhone and how to use them to produce high-quality content!
🎬 Getting Started: Turning Your iPhone Into a Professional Video Camera
Before we jump into the nitty-gritty, let’s set the stage.
The iPhone is packed with advanced features that can rival professional video cameras. We will go over not just the settings, but also best practices to help you achieve those ideal video results you are aiming for.
📱 Record Video Settings
First things first—open up your iPhone’s Settings, scroll down, and tap on “Camera.” Once there, head to “Record Video.”
Resolution and Frame Rate: The sweet spot for most users is 4K at 30p or 60p. While you might be tempted to shoot in 4K 24p, which is common for dedicated cameras, it doesn’t translate well on iPhones. Instead, it often looks choppy, so stick with 30p or 60p for smoother results.
Enhanced Stabilization: Turn this on! It helps in making your videos look steadier, reducing the shaky-cam effect that can distract from your content.
HDR Video: Keep this off. While HDR can be great, not everyone has an HDR display, and you don’t want to limit your audience. By keeping it off, your videos will be more universally compatible.
Auto FPS: Disable this setting. When enabled, your iPhone might drop to 24p in low-light conditions, which isn’t ideal. Consistency is key, so keeping this off ensures your frame rate stays steady.
Lock White Balance: Absolutely yes! This is crucial for maintaining consistent color tones throughout your video, especially when shooting in environments with varying lighting conditions.
🎥 Slo-Mo & Cinematic Mode: Use Them Wisely
When it comes to recording slow motion or using the cinematic mode, it’s important to know when and how to use these features.
Slow Motion: Instead of relying on the built-in slo-mo feature, consider shooting in 4K 60p and slowing it down by 50% during editing. Why? Because this approach gives you better control over the final output, ensuring the slow-motion effect is smooth and intentional.
Cinematic Mode: Despite its name, cinematic mode isn’t truly cinematic. The digital blur it adds can look artificial. If you strive for a professional look, skip this setting and rely on traditional shooting techniques.
⚙️ Formats: Choosing the Right One
The format you choose impacts the quality and flexibility of your video in post-production.
High Efficiency: Opt for this mode when shooting regular photos and videos. It compresses files efficiently, saving space on your device.
ProRAW & Resolution Control: Enable these for heavy editing. ProRAW gives you a lot of data to work with, which is ideal for color grading and detailed edits. The 48-megapixel setting is particularly powerful, offering almost the same quality as some full-frame cameras. However, remember that the 48MP option only applies to the main camera; the other lenses will still shoot at 12MP.
🎞️ Understanding ProRes
ProRes is a game-changer for those serious about video quality. It allows your iPhone to capture video with a similar color depth to professional cinema cameras.
Why Use ProRes?
Initially, ProRes footage might look washed out, but don’t be fooled. It contains a wealth of color data that you can manipulate in post-production. Whether color grading manually or using a LUT (Look-Up Table), ProRes gives the flexibility to achieve a film-like quality.
Limitations: On an iPhone, ProRes is capped at 4K 30p unless you use an external SSD. Even at 4K 30p, the file sizes can be massive, so an SSD is highly recommended if you use ProRes frequently.
🔄 Preserve Settings: Keeping Your Preferences Intact
One of the most frustrating things about shooting with an iPhone can be when the camera resets to its default settings. Fortunately, there’s a fix.
Preserve Settings: Go to “Preserve Settings” in your camera settings and toggle on the options you use most. This way, your iPhone remembers your preferred camera mode, macro settings, and exposure adjustments every time you open the camera app.
Macro Mode: Keep this on, and don’t worry—it won’t automatically switch to macro every time you get close to an object. Instead, it will prompt you, giving you the option to toggle it on manually.
🌞 Exposure Adjustments: Finding the Sweet Spot
Exposure can make or break a video. Overexposed footage can look unprofessional and washed out, especially in bright conditions.
Underexpose Slightly: Setting your exposure to -0.7 can help retain highlight details, especially in bright skies or well-lit scenes. This small adjustment ensures your footage captures a full range of details without losing the highlights to overexposure.
🎯 Action Mode
Action mode is designed to help stabilize footage when you’re on the move, but it comes with trade-offs.
Leave It Off: In most cases, you are better off with enhanced stabilization, which works great at smoothing out footage without compromising on resolution or frame rate. Only use action mode when absolutely necessary, as it can limit your ability to shoot in 4K.
📏 Burst Settings
Burst mode is excellent for capturing fast-moving subjects in photography, but it’s less useful in videography.
Volume Up for Burst: If you are not using burst mode frequently, it’s better to leave this option off. You can always activate burst mode manually by dragging the shutter button if you need it.
🎨 Composition: Mastering the Art of Framing
Good composition can elevate your video from amateur to professional.
Grid and Level: Turn on the grid and level tools in your camera settings. These will help you frame your shots perfectly, keeping horizons straight and ensuring that your subject is well-aligned within the frame.
📸 Main Camera Lenses: Keeping It Simple
When it comes to your main camera lenses, sometimes it’s best to stick with the default settings.
24mm Lens: Keep your 24mm lens at its default setting. This focal length is versatile and works well for most shooting situations.
👤 Portrait Mode: Finding the Right Aperture
Portrait mode on the iPhone allows for beautiful depth-of-field effects, but there’s a catch.
Aperture Settings: Be cautious when selecting an aperture wider than f/4. The iPhone’s portrait mode still struggles with accurately cutting out the subject from the background at wider apertures, which can result in a fake-looking blur. Stick to f/4 or f/4.5 for the most realistic results!
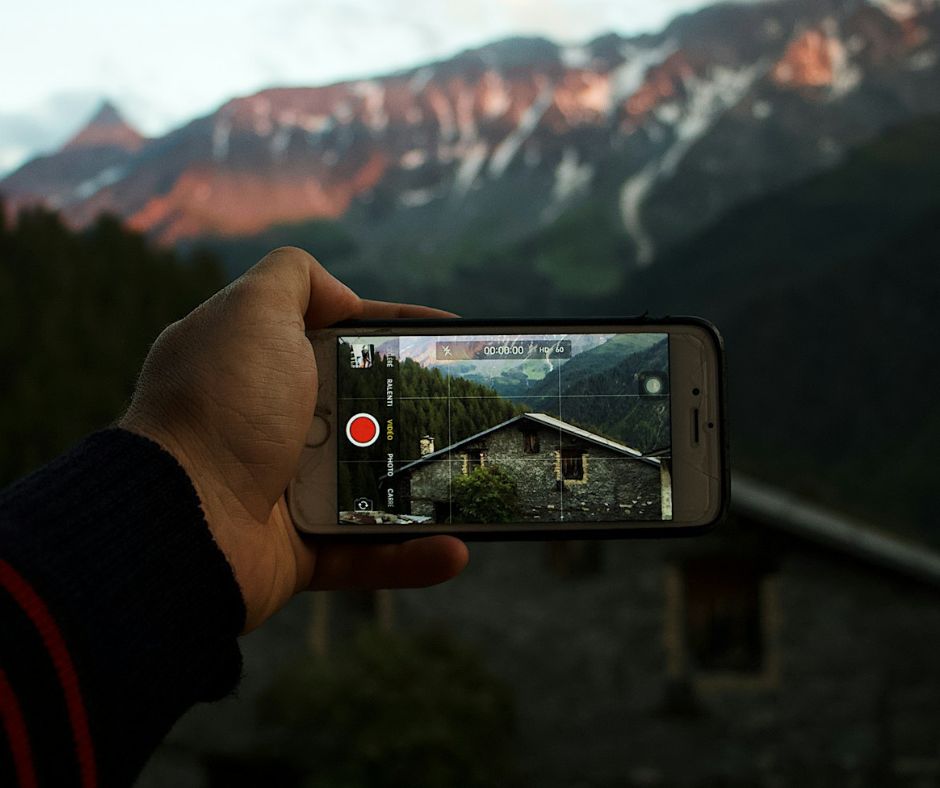
Camera App Video Settings
Now that you have set the best video settings for iPhone, go back into the Camera app to start applying those settings right away. Slide over to Video Mode. Starting from the top right, you will see the option for Action mode. You can turn it on if needed, but keep it off for now.
Next to that, you can switch between HD and 4K with different frame rates. 4K 60p is the go-to for regular video capture. However, as soon as you try to activate the ProRes log, notice it says ProRes isn’t supported. That’s because, for 4K 60p ProRes, you need to connect an external SSD.
Even for 4K 30p ProRes, the files are enormous, so we highly recommend using an external SSD. The internal storage simply won’t cut it.
For example, a 2TB Samsung T7 SSD gives around 2 hours of 4K 60p ProRes recording. Plus, it’s super convenient; you can plug this attachment straight into your computer and start editing right away via USB-C.
Avoid AirDropping the footage, as it takes forever. When it comes to exposure, set it to -0.7 by default, but for darker scenes, set it back to 0. Otherwise, the footage might be too dark and grainy.
Video File Formats on iPhone
When filming with an iPhone, the video file formats available are:
- MOV (QuickTime Movie) The default video file format for iPhones. MOV files are container formats that can hold video, audio, and text. They typically use the H.264 or H.265 (HEVC) video codec and AAC audio codec. MOV is widely compatible with most devices and editing software, making it a versatile choice for video recording.
- MP4 (MPEG-4 Part 14) While not a default format for iPhones, MP4 is closely related to MOV and is supported by many apps and devices. MP4 files also use H.264 or H.265 (HEVC) for video compression and AAC for audio. MP4 is commonly used for web streaming and sharing due to its efficient compression and broad compatibility.
- HEVC (High-Efficiency Video Coding) Also known as H.265, this codec is used to compress video files more efficiently than H.264, resulting in smaller file sizes with similar or better quality. HEVC is available for recording in 4K and higher resolutions, providing better storage efficiency.
- ProRes A professional video format with various levels (e.g., ProRes 422, ProRes 4444) used for high-quality video recording. ProRes files are larger and less compressed, providing higher color fidelity and detail. Ideal for professional video editing and post-production. Available on iPhones with iOS 15 and later, but requires additional storage due to large file sizes.
- HEIF (High-Efficiency Image File Format) Primarily used for photos, HEIF can also store video content using the HEVC codec. Although less common for video, HEIF can be used for highly compressed, high-quality video storage.
Transform Your Videos with Online Convert
Looking to convert your videos to a different format? Discover how Online Convert’s free Video Converter can streamline the process for you!
Whether you need AVI, WebM, WMV, FLV, MKV, MPG, OGV, or other popular formats, this highly versatile online file converter is your ideal solution.
Why Choose Online Convert’s Video Converter?
- Versatile Formats: Easily convert your media files to many formats.
- User-Friendly Interface: Simply upload your file and adjust the optional settings.
- Instant Conversion: Click ‘START’, and let the video converter handle the rest. Your new video file will be ready in no time!
There is no need for complicated software — just a few clicks, and you are set.
Try Online Convert’s Video Converter today and enjoy seamless media file conversions online!