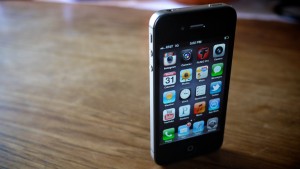
Sure, those ringtones inherited by your iPhone or available on iTunes are nice, but don’t you want a more personal one? A part of your favorite song, or simply one that gets you up and going in the morning? To achieve that, you do not have to purchase a ringtone from the iTunes store! We can show you how it can be done very easily using the fitting cost-free resources and your iTunes library!
1. Grab the Song
First things first. Do you know which part of the song you want as your ringtone? You need to remember the exact part with the start and ending time to the second. Best, you write it down somewhere real quick.
Now, you can basically choose any free audio converter to trim the song, however, using this M4A converter can save you a later step already. Go to the converter and upload the song you want to trim. Under “Trim Audio” you can enter the start and ending time. After hitting “Convert File”, the song will be cut and the part you wanted will be converted to M4A. Using iTunes or the Apple Quick Time Player, you can now listen to the part of your song again, making sure it’s the one you want. The best thing about this: your original song will remain untouched, contrary to clipping and converting it using iTunes.
Once you have the desired part, you can move on to step 2.
2. Get the Ringtone File
Having an M4A file to begin with is nice, however it’s not the one suitable for iPhone ringtones. To get the appropriate file, you have to locate your downloaded and converted file first. Either, it will be stored in the folder specified in your browser’s download history, or you can select it from there directly and choose “Show in folder” or something similar after right-clicking on the file. You will be lead to the download destination right away.
To change the file, you will have to rename it. However, not the name of the file itself, but the name of the file extension. If you’re lucky, you can simply right-click on the image and choose “Properties” or “File Info”. There, you can rename the file extension as well as the name of the file. In case the file extension is not visible, you have to switch it on. There are different tutorials about that on the internet, depending on which version of Windows or iOS you have; for example this one for OS X Mountain Lion.
Once you are ready, all you have to do is change the file extension of your file to “M4R”. For example, your file had had the name “Rhianna-Umbrella.m4a” and now you renamed it to “Rhianna-Umbrella.m4r”. Once you tried to apply this change, your computer will send a warning and ask you, whether you really want to change the file extension. Confirm.
3. Add your Ringtone to iTunes and your iPhone
Once you renamed your file, you can drag and drop it into your iTunes library. It will show up under “Tones”.
To get the ringtone to your phone, you will have to sync your iPhone to your computer. In your iPhone menu on iTunes, you have to go to Tones and select “Sync Tones”. Hit “Sync” and “Apply” and wait. Once the sync is completed, you can use your new ringtone! Simply go to “Settings > Sounds > Ringtone” and choose it as your currently used one.
