With Amazon S3, the popular online retailer provides a powerful cloud storage solution. If you are using the Amazon Web Services (AWS) as well, you can now integrate it with the Online Convert file conversion API.
The following tutorial will show you all the steps you need to convert files you have in your Amazon S3 bucket or save the converted file to the bucket.
API Integration With Amazon S3
This tutorial is split into two parts. The first will guide you through the setup of the AWS in order to use the online file conversion API.
In the second part, we will show you how to convert files from the S3 bucket or save converted files there using Postman.
Set Up Your Amazon S3
First of all, you have to set up your Amazon S3 account to handle the file conversion. This tutorial will show you, step by step, how to create all the policies, users, and anything else you need.
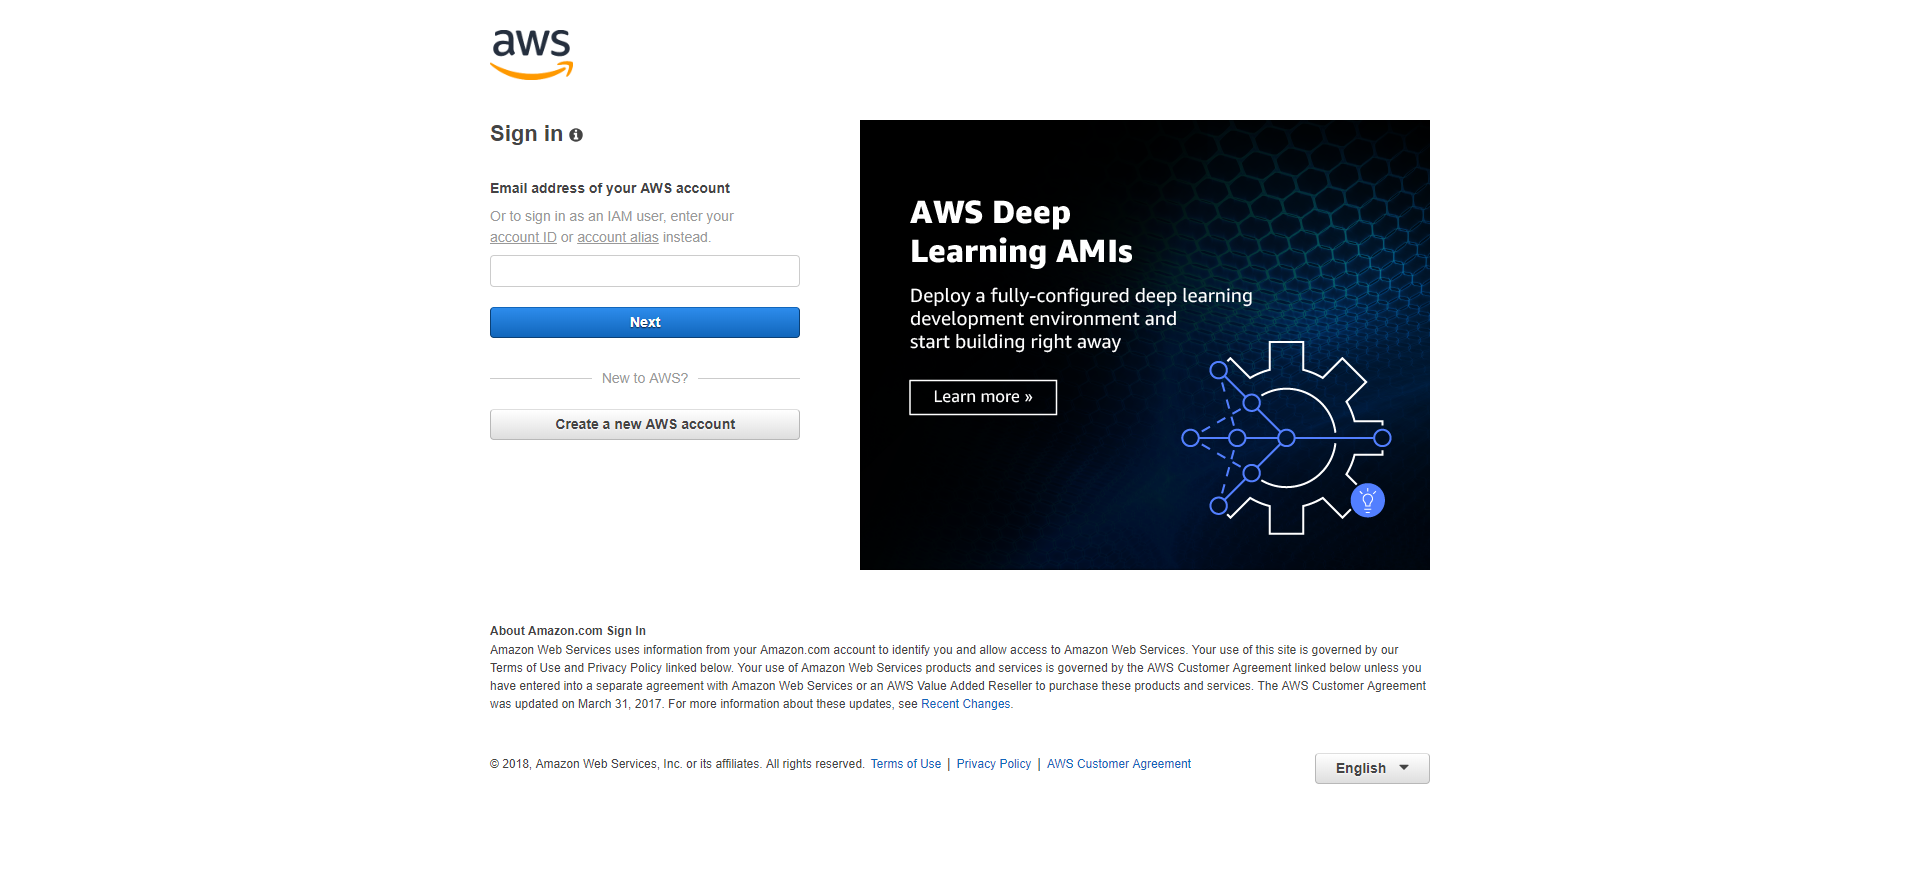
1. Log in to your Amazon Web Service Account.
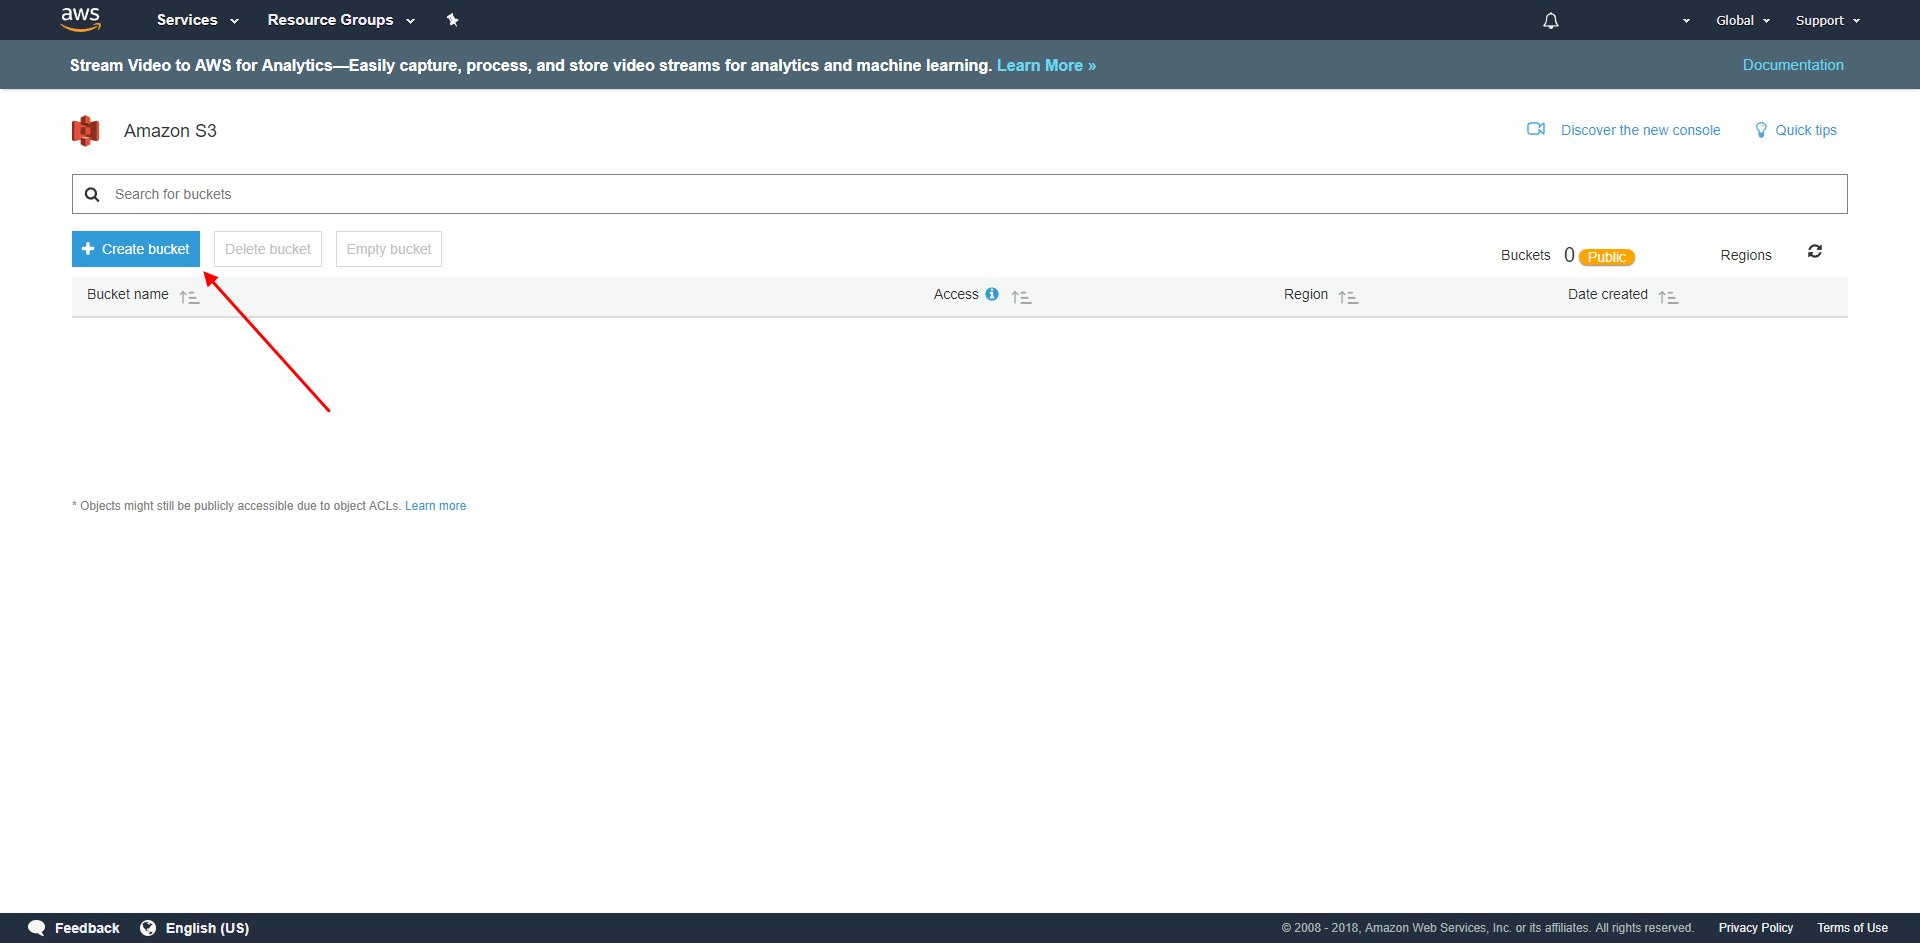
2. Create a new bucket. If you already have a bucket you want to use, you can skip this step.
2.1. Click on “Create Bucket”
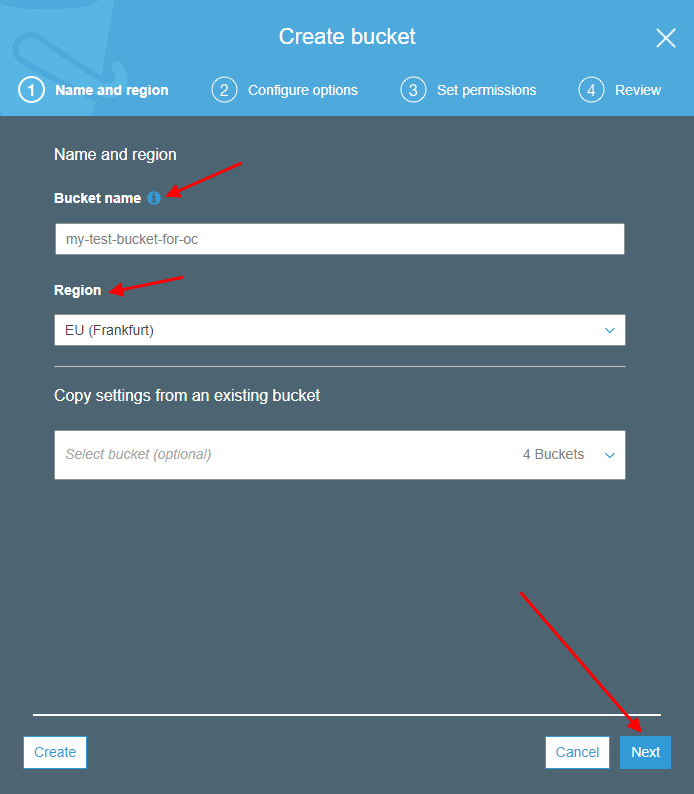
2.2. Enter a name and region for the bucket
It’s recommended to use the region closest to your location.
2.3. Click on “Next”
2.4. Leave the options as is and click on “Next”
2.5. Leave the permissions and click on “Next”
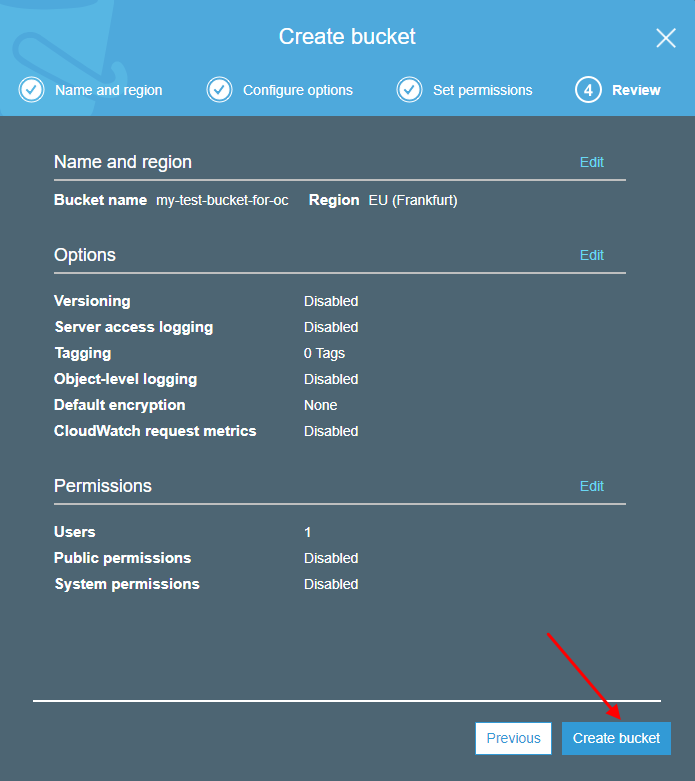
2.6. Review your settings and click on “Create bucket”
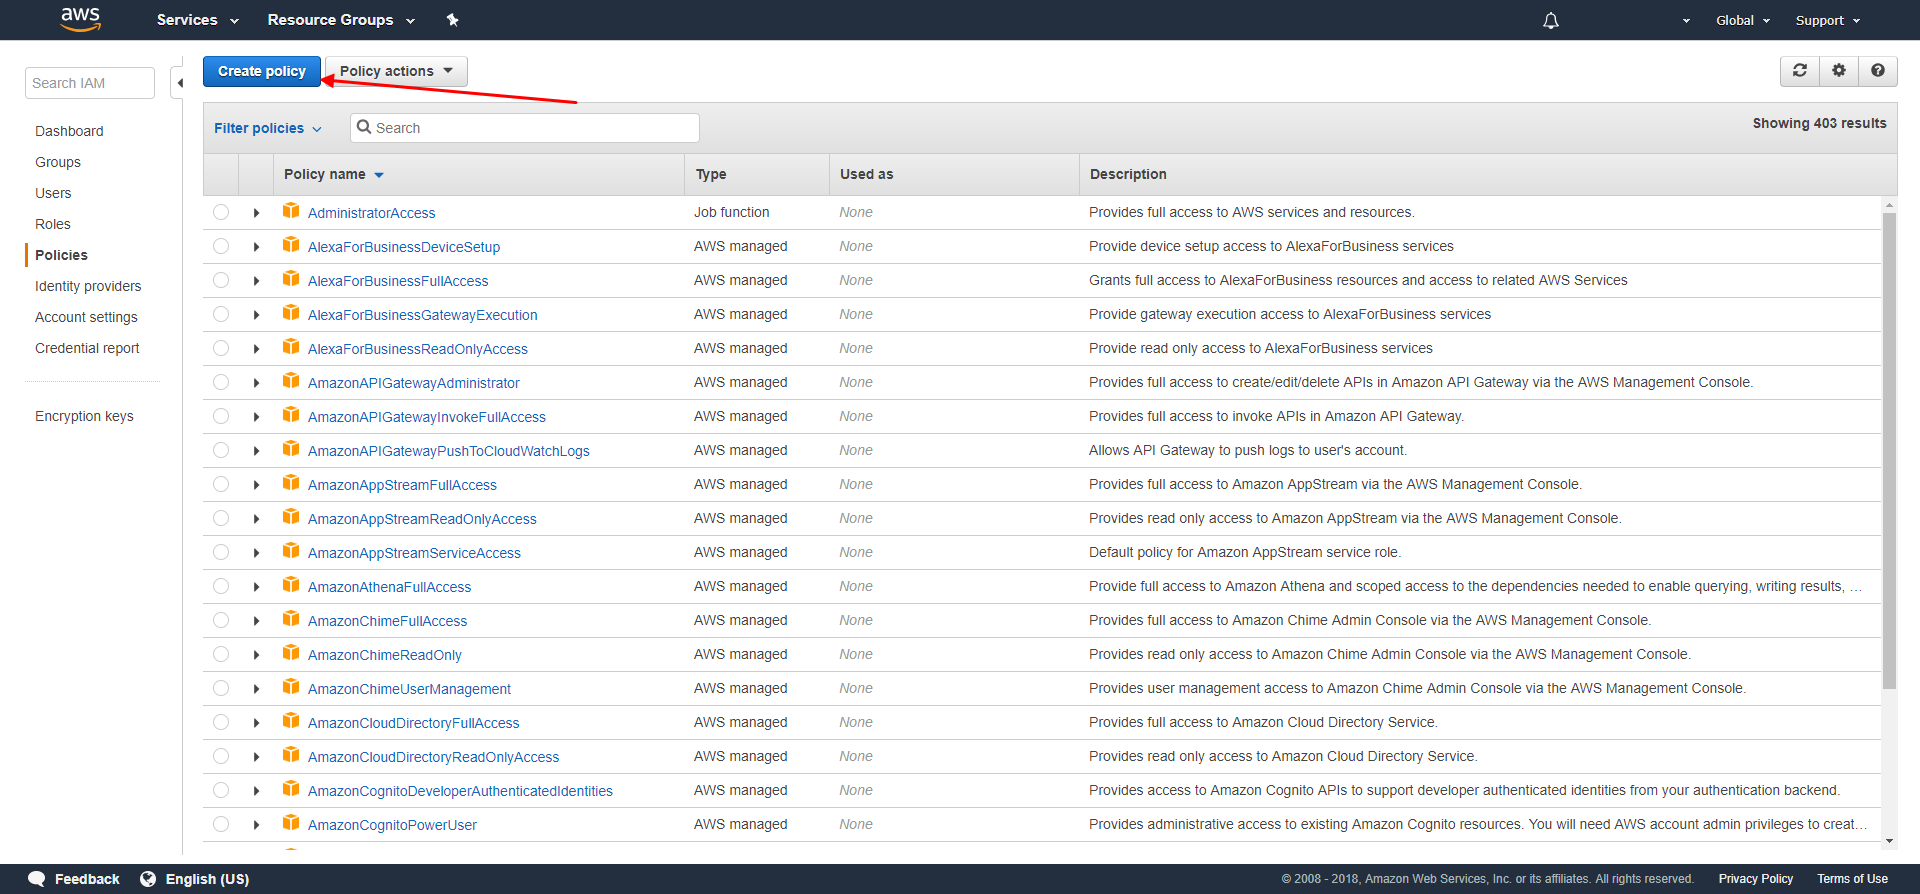
3. Create a policy.
3.1. For this, you have to go to https://console.aws.amazon.com/iam/home#/home
3.2. Click on “Policies” in the side-navigation

3.3. Click on “Create policy”
3.4. Change from the visual editor to the JSON input option
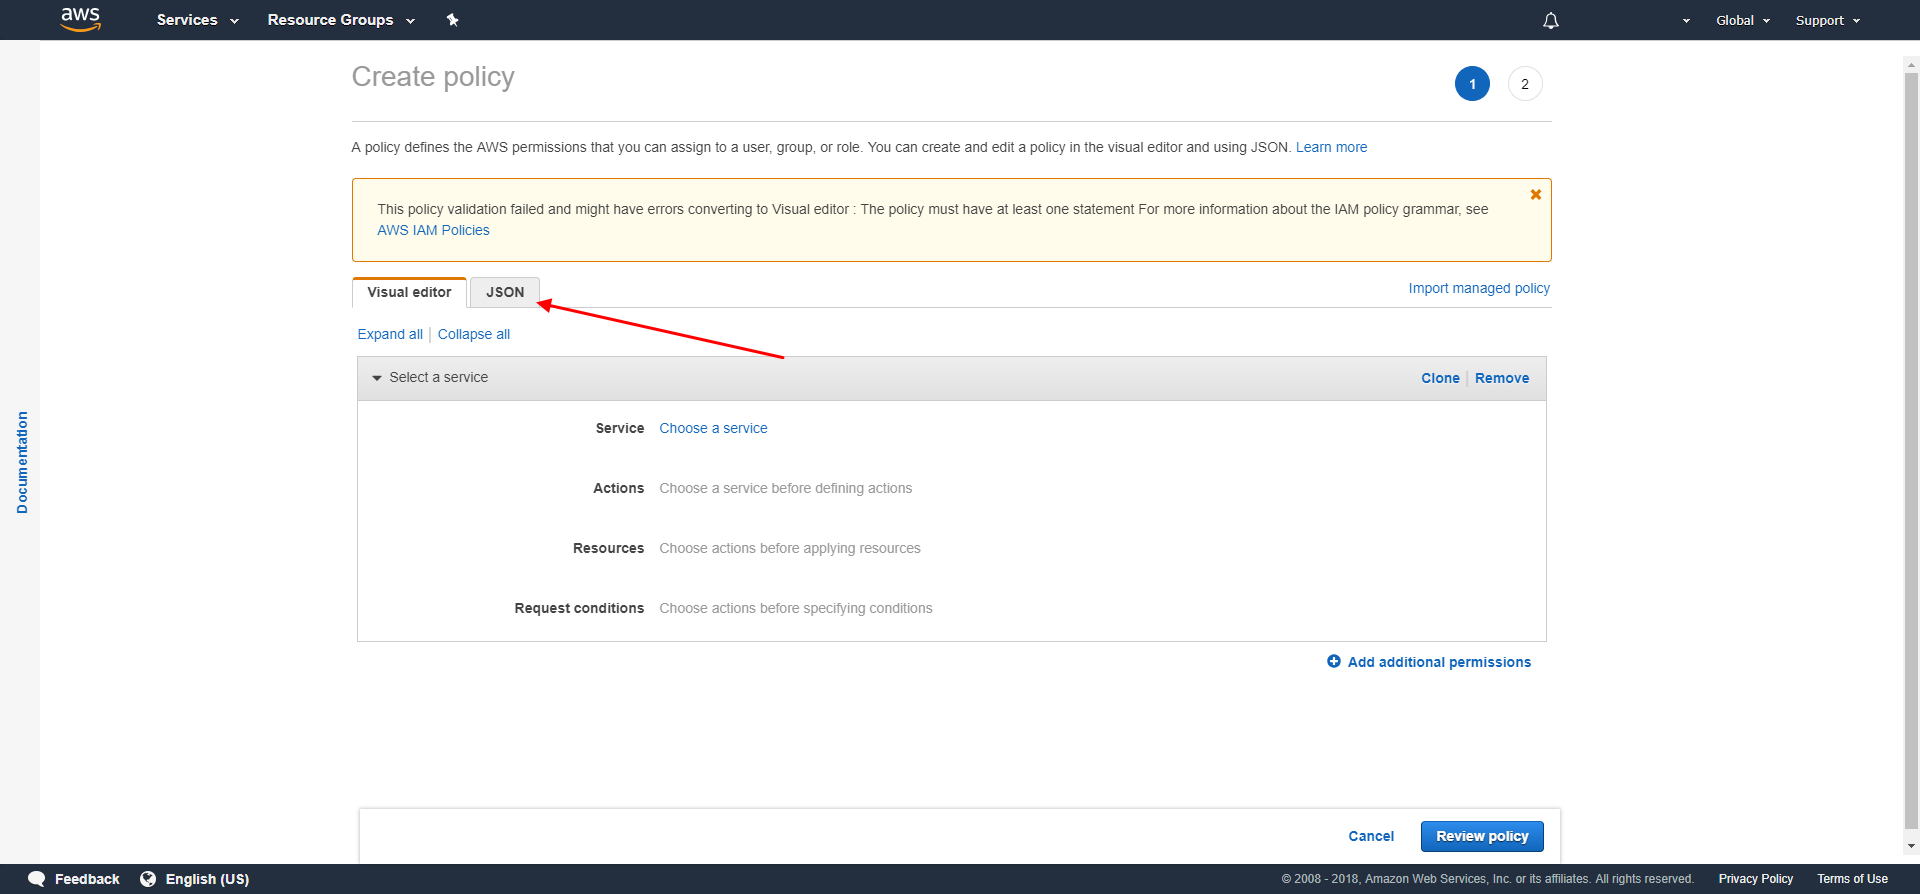
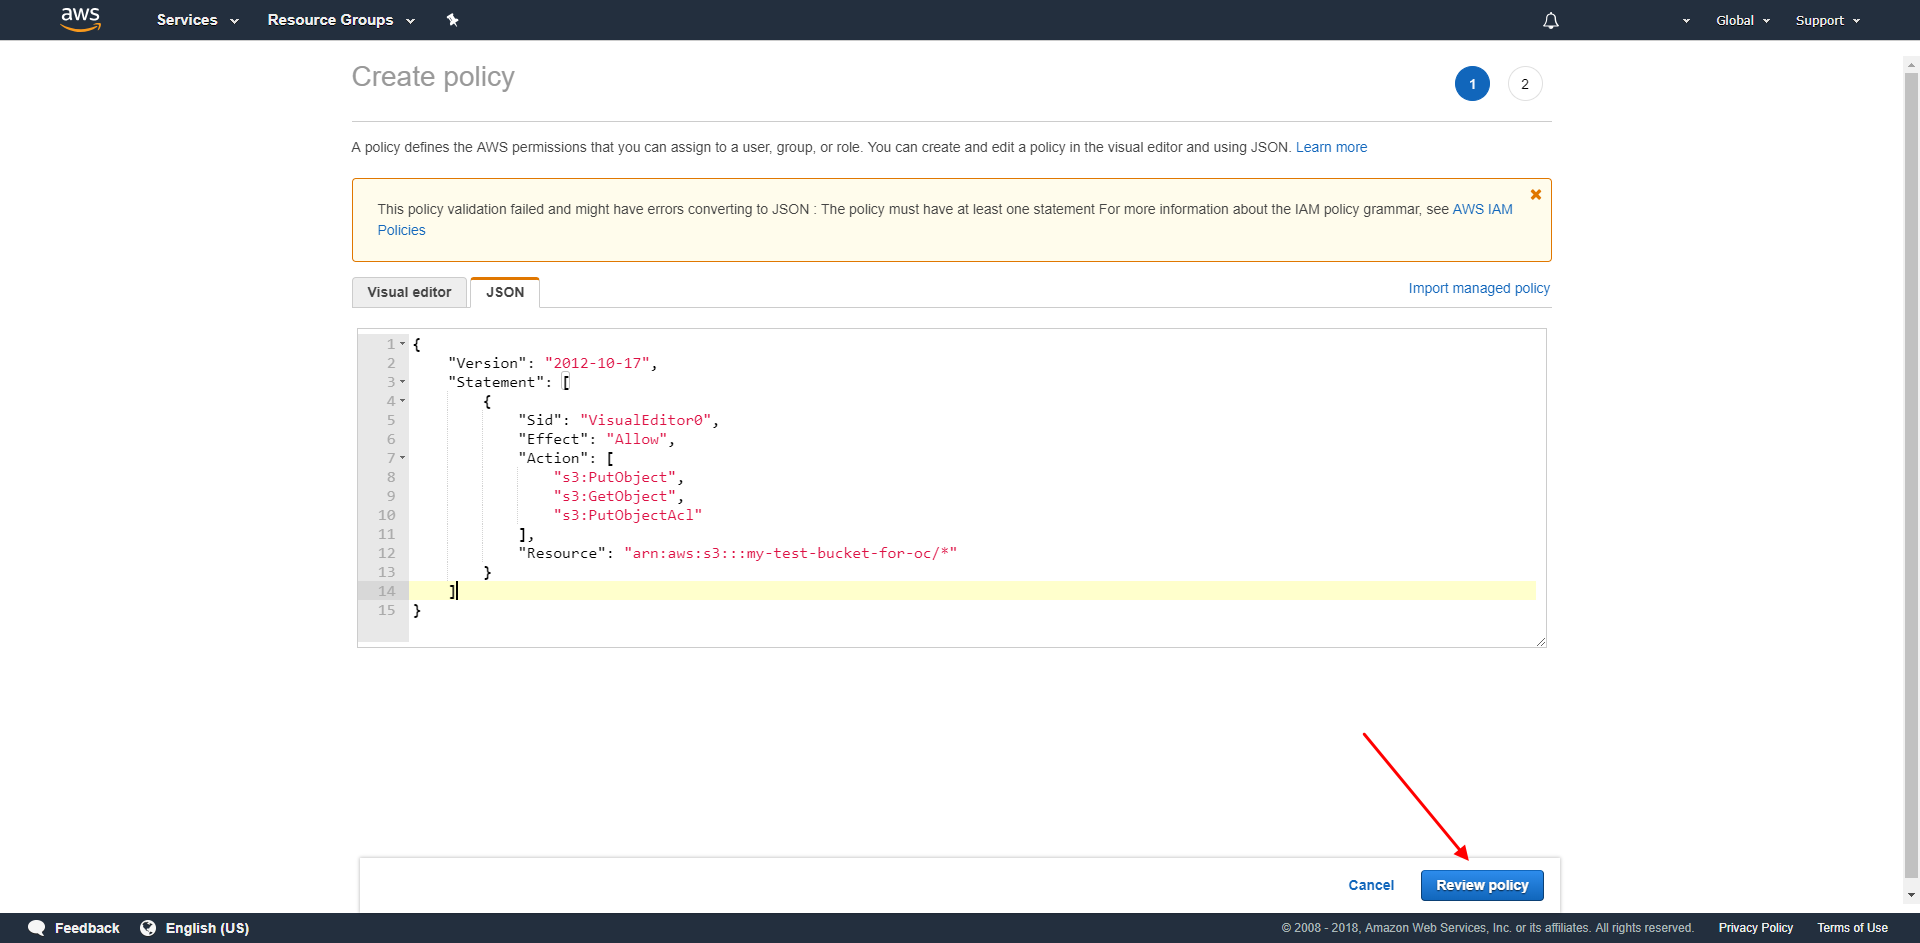
3.5. Replace the empty statement with the following
"Statement": [
  {
    "Sid": "VisualEditor0",
    "Effect": "Allow",
    "Action": [
      "s3:PutObject",
      "s3:GetObject",
      "s3:PutObjectAcl"
    ],
    "Resource": "arn:aws:s3:::my-test-bucket-for-oc/*"
  }
]
3.6. Click on “Review policy”
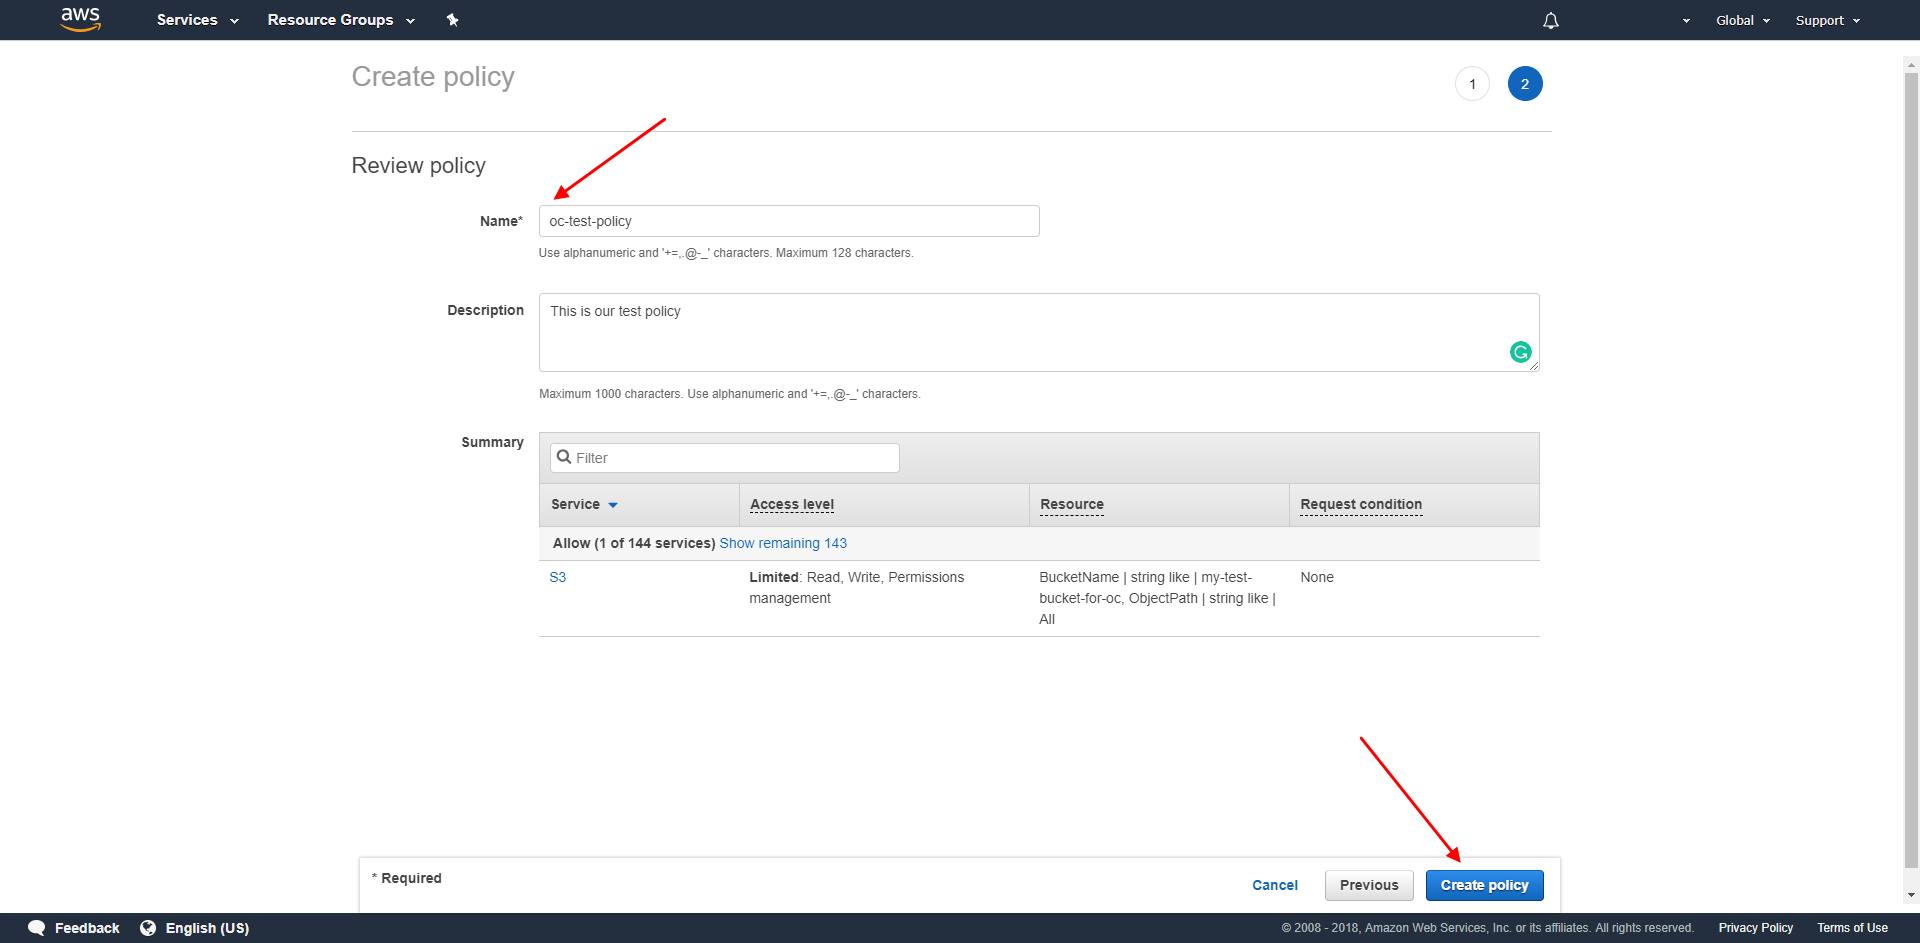
3.7. Enter a name and, if you want, a description for the policy and click on “Create policy”
4. Create a group.
4.1. For this, you have to go to https://console.aws.amazon.com/iam/home#/home
4.2. Click on “Groups” in the side-navigation
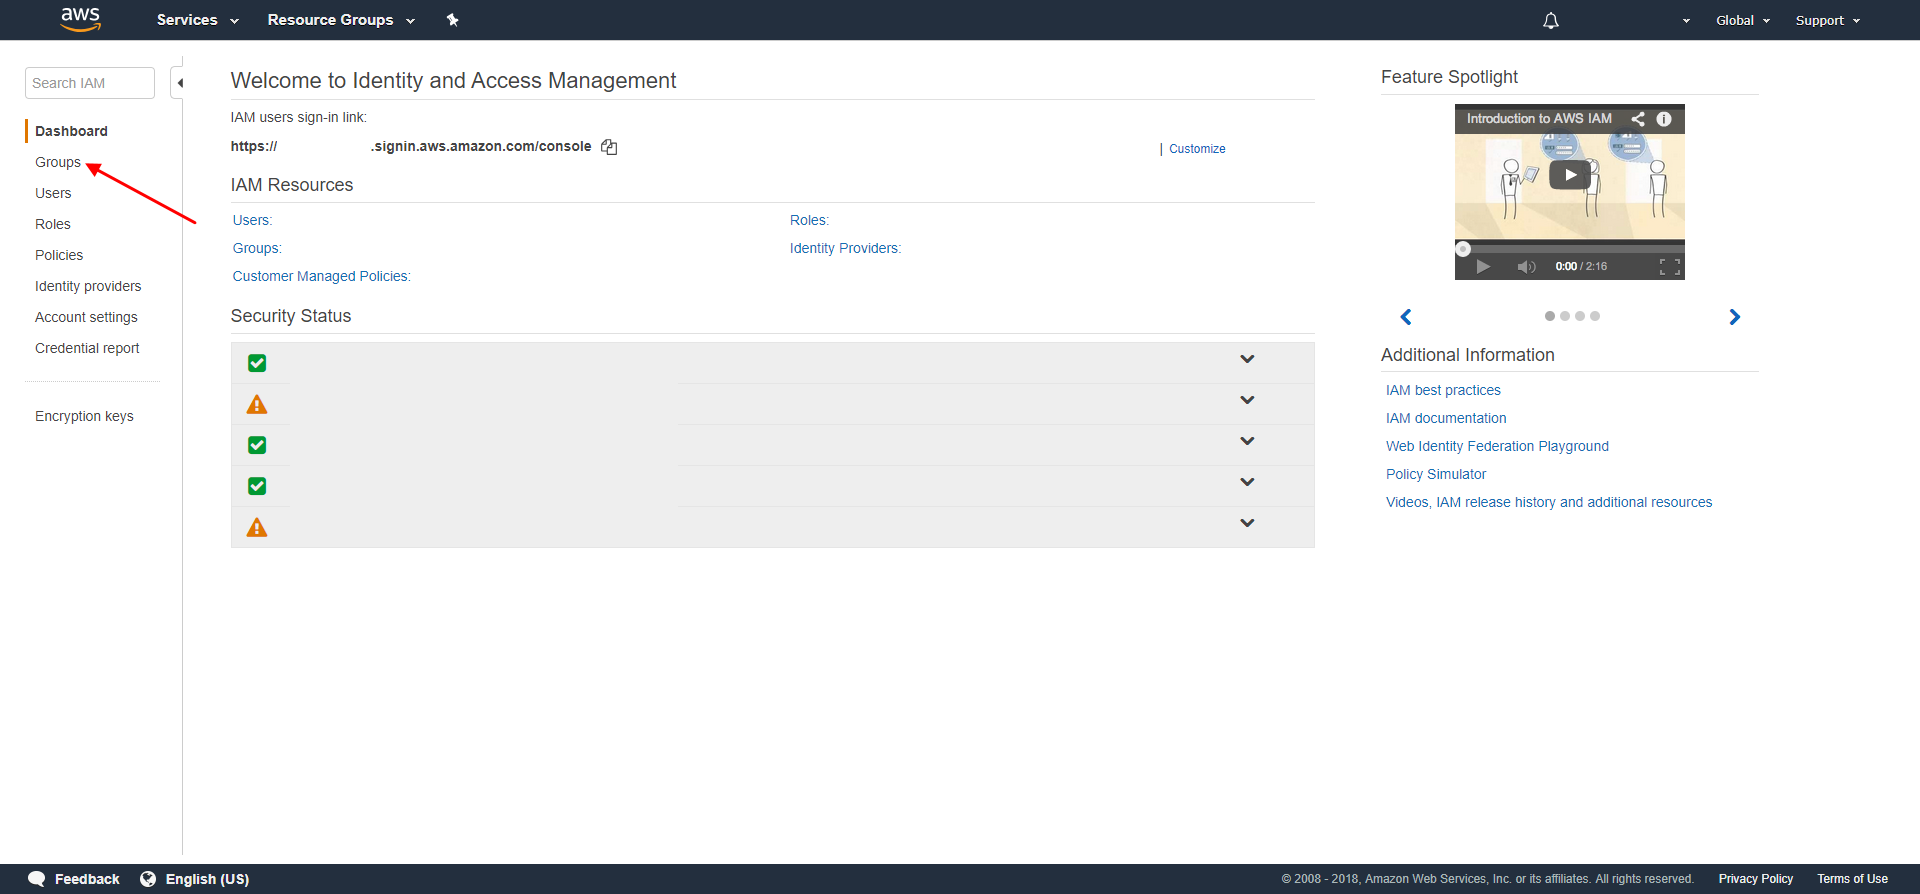
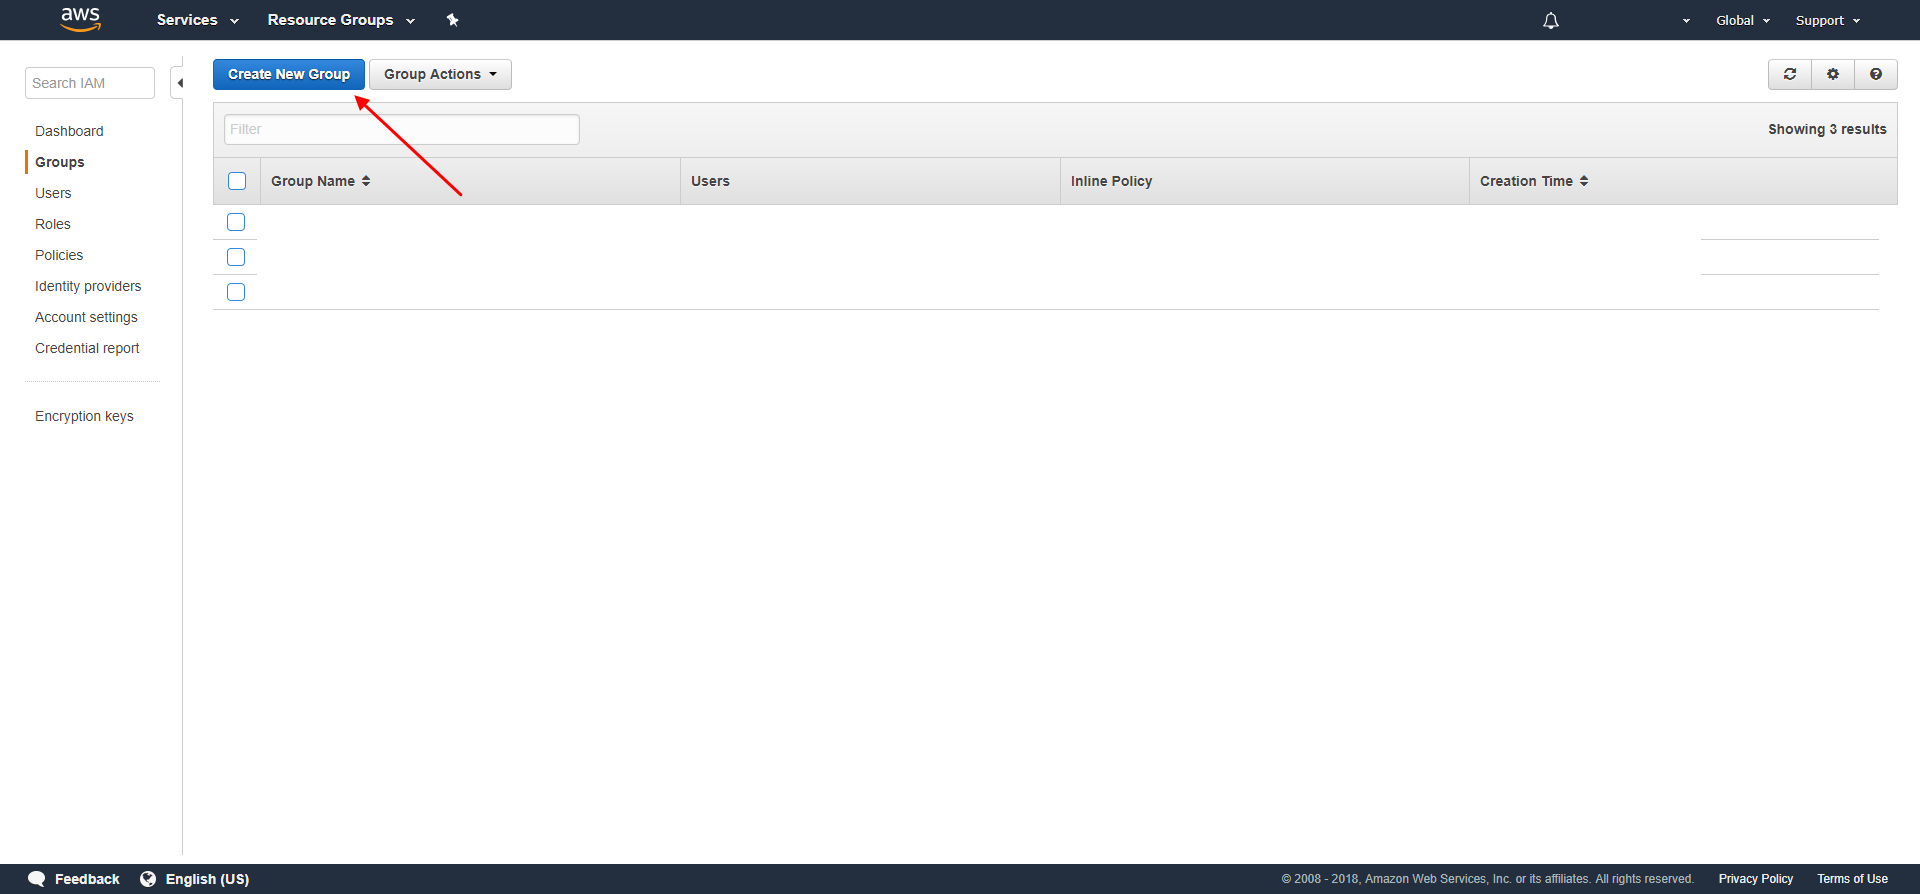
4.3. Click on “Create New Group”
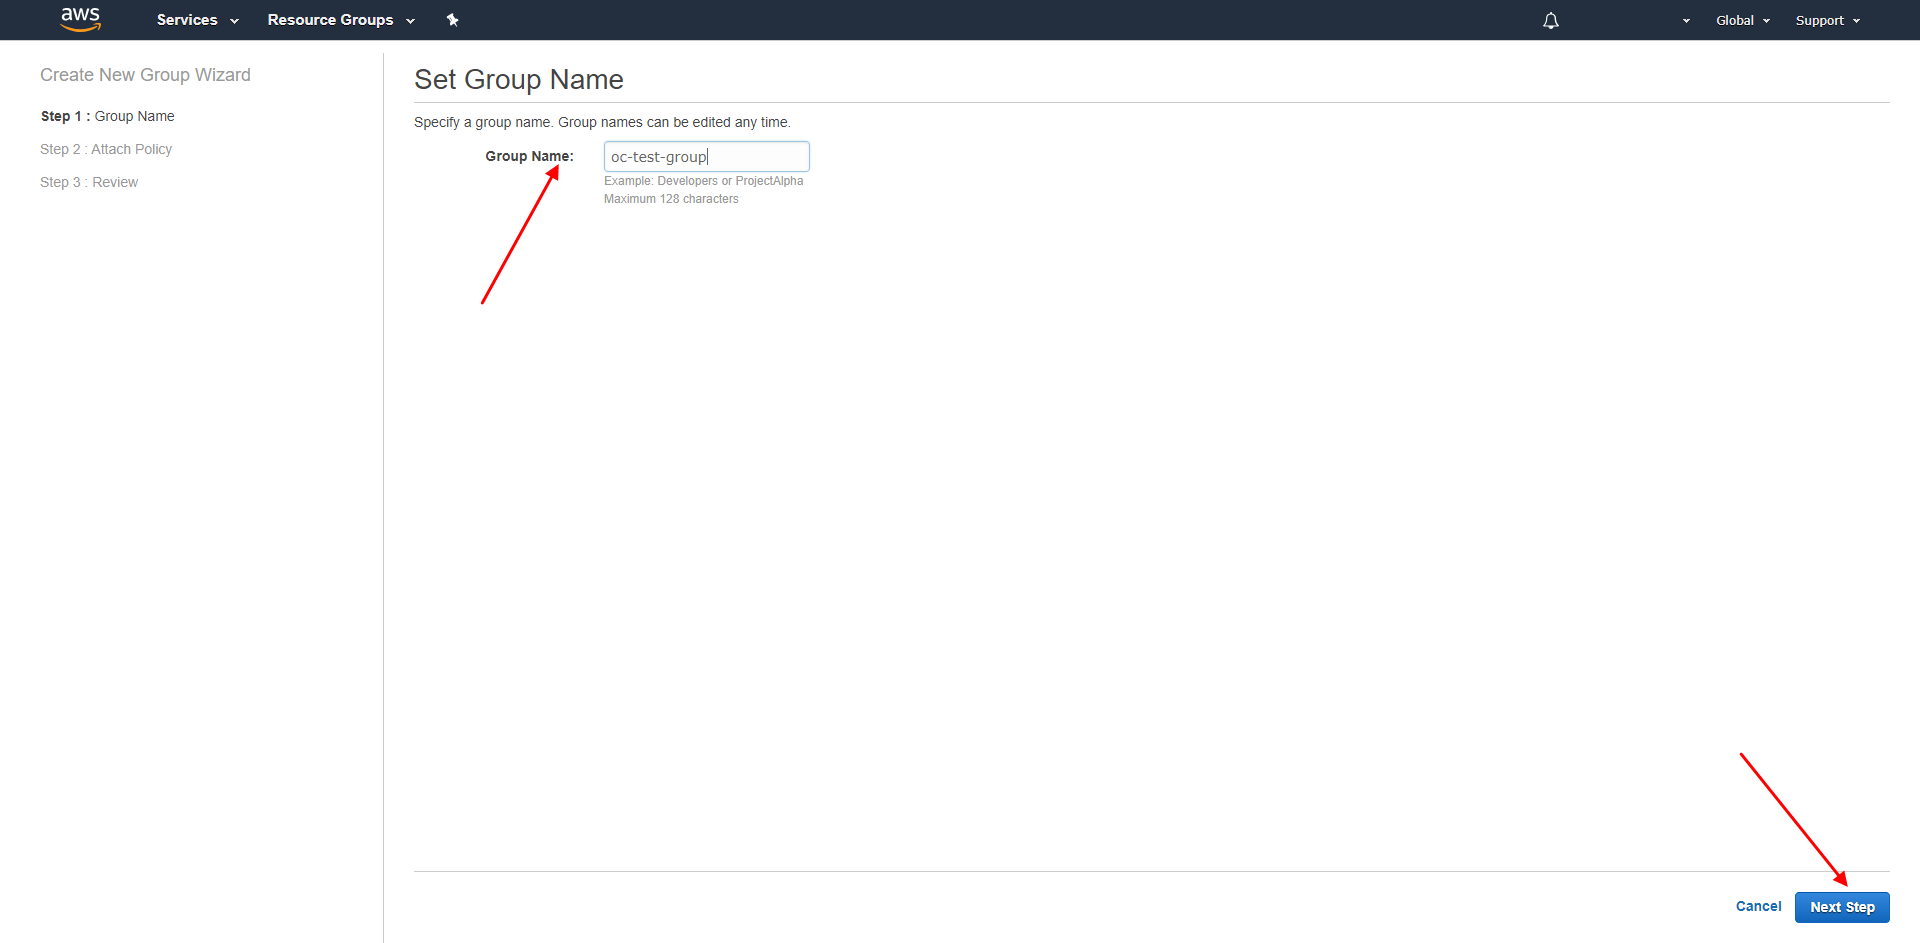
4.4. Enter a name for the group, then click on “Next Step”
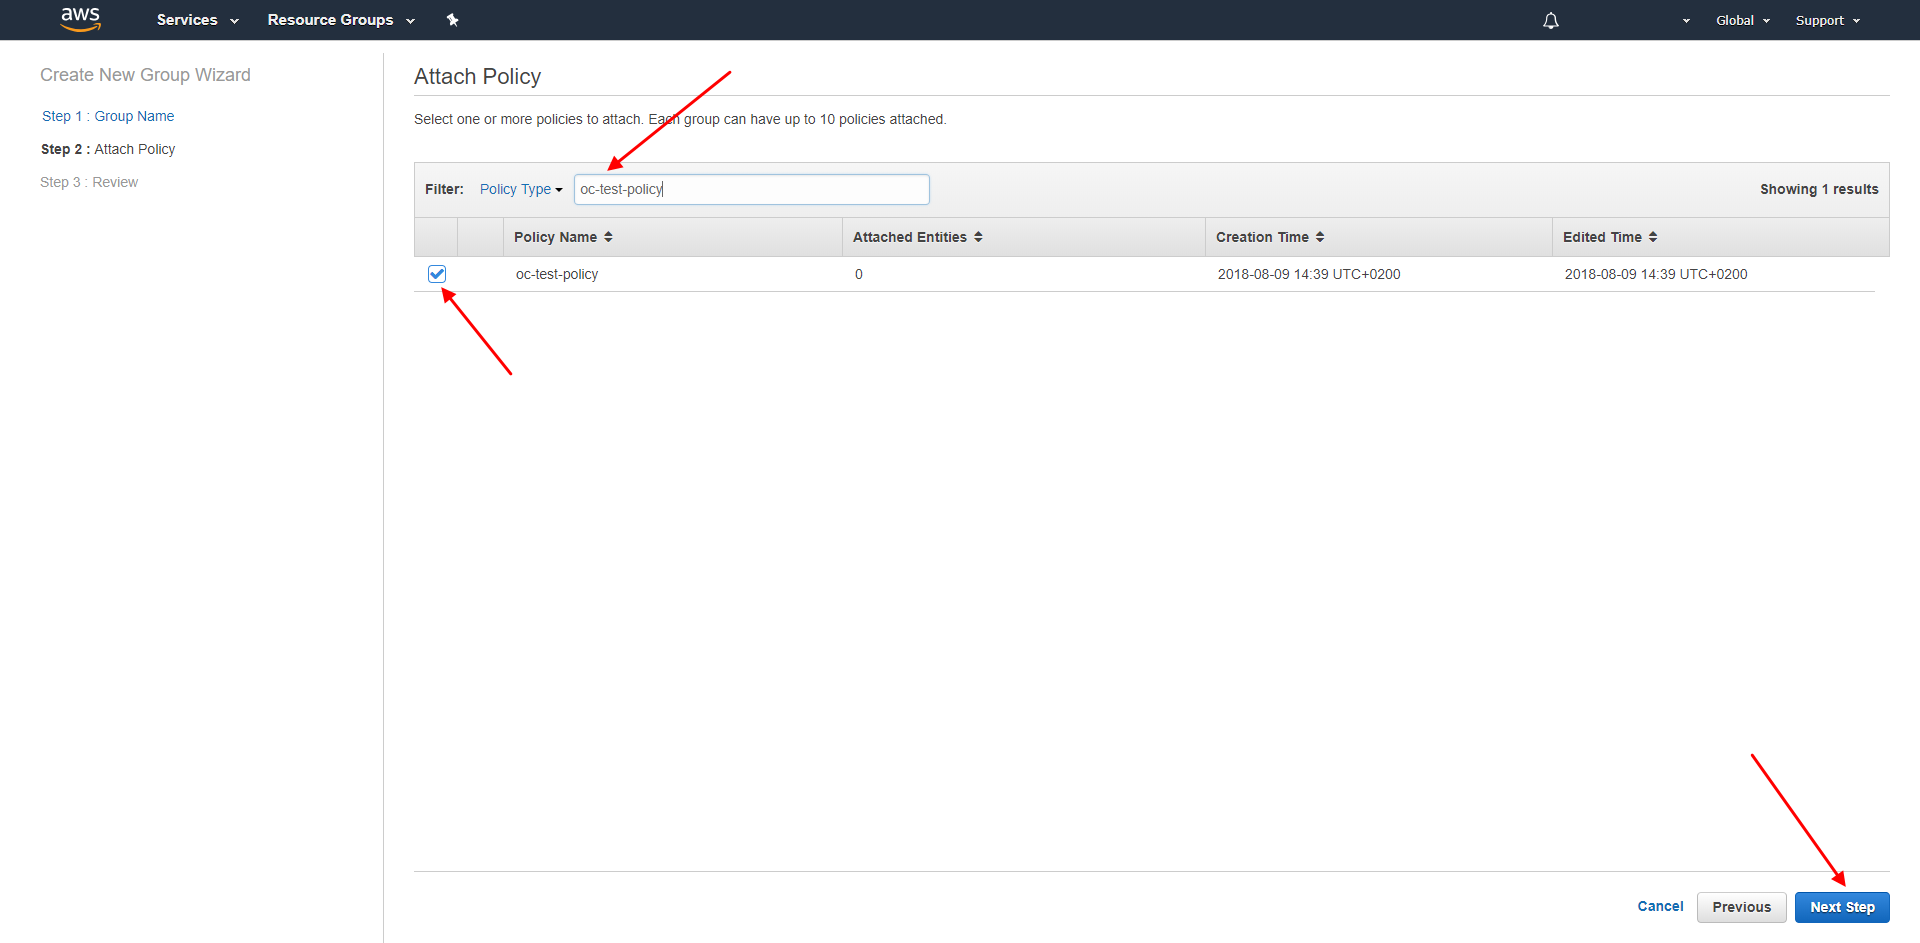
4.5. Search your policy to attach it to the group, then click on “Next Step”
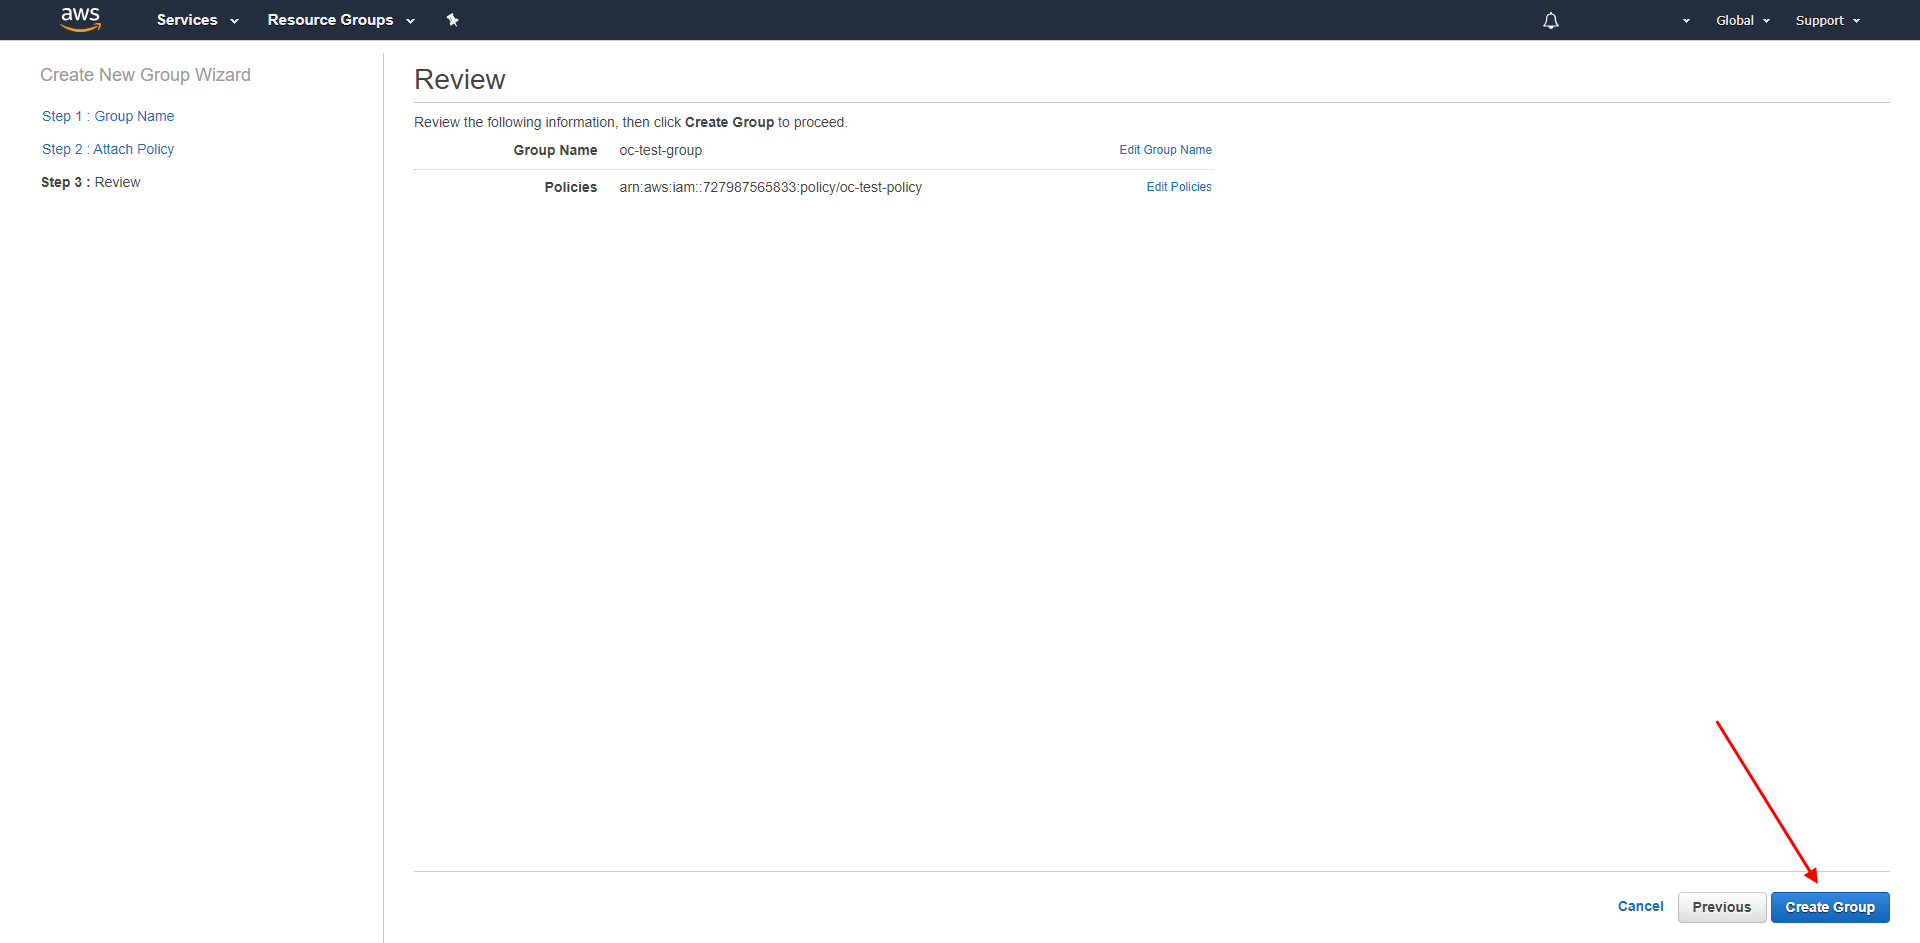
4.6. Review the information and click on “Create Group”
5. Create a user.
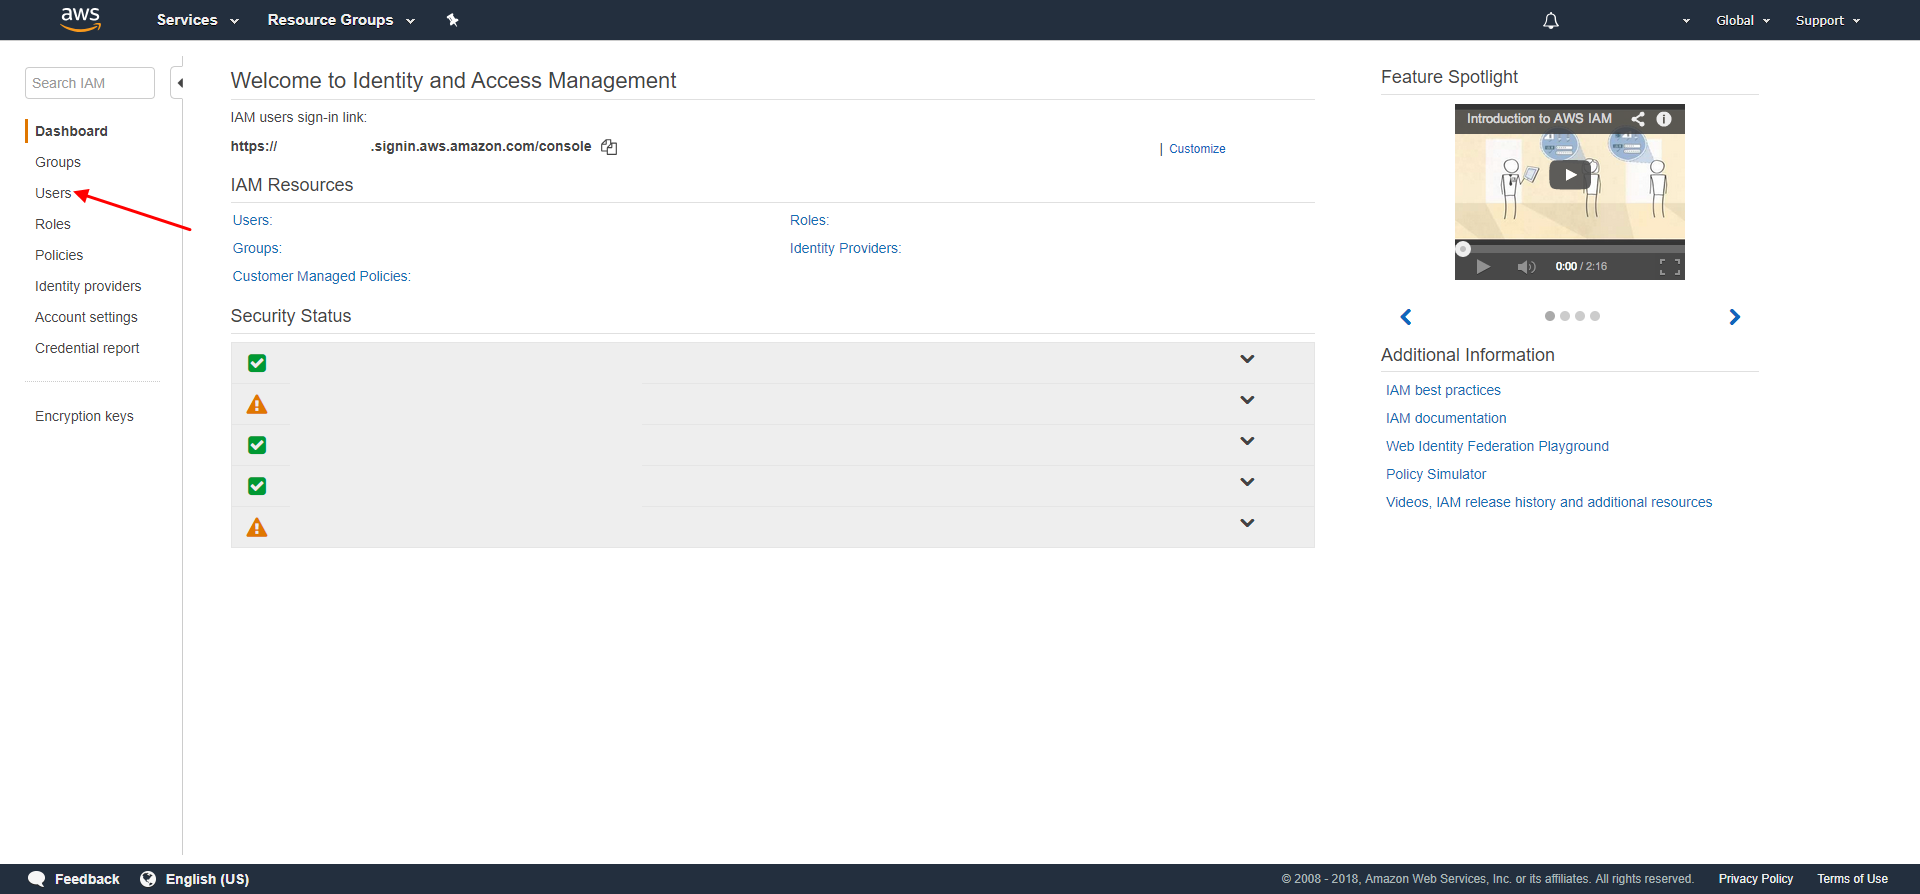
5.1. For this, you have to go to https://console.aws.amazon.com/iam/home#/home
5.2. Click on “Users” in the side-navigation
5.3. Click on “Add user”

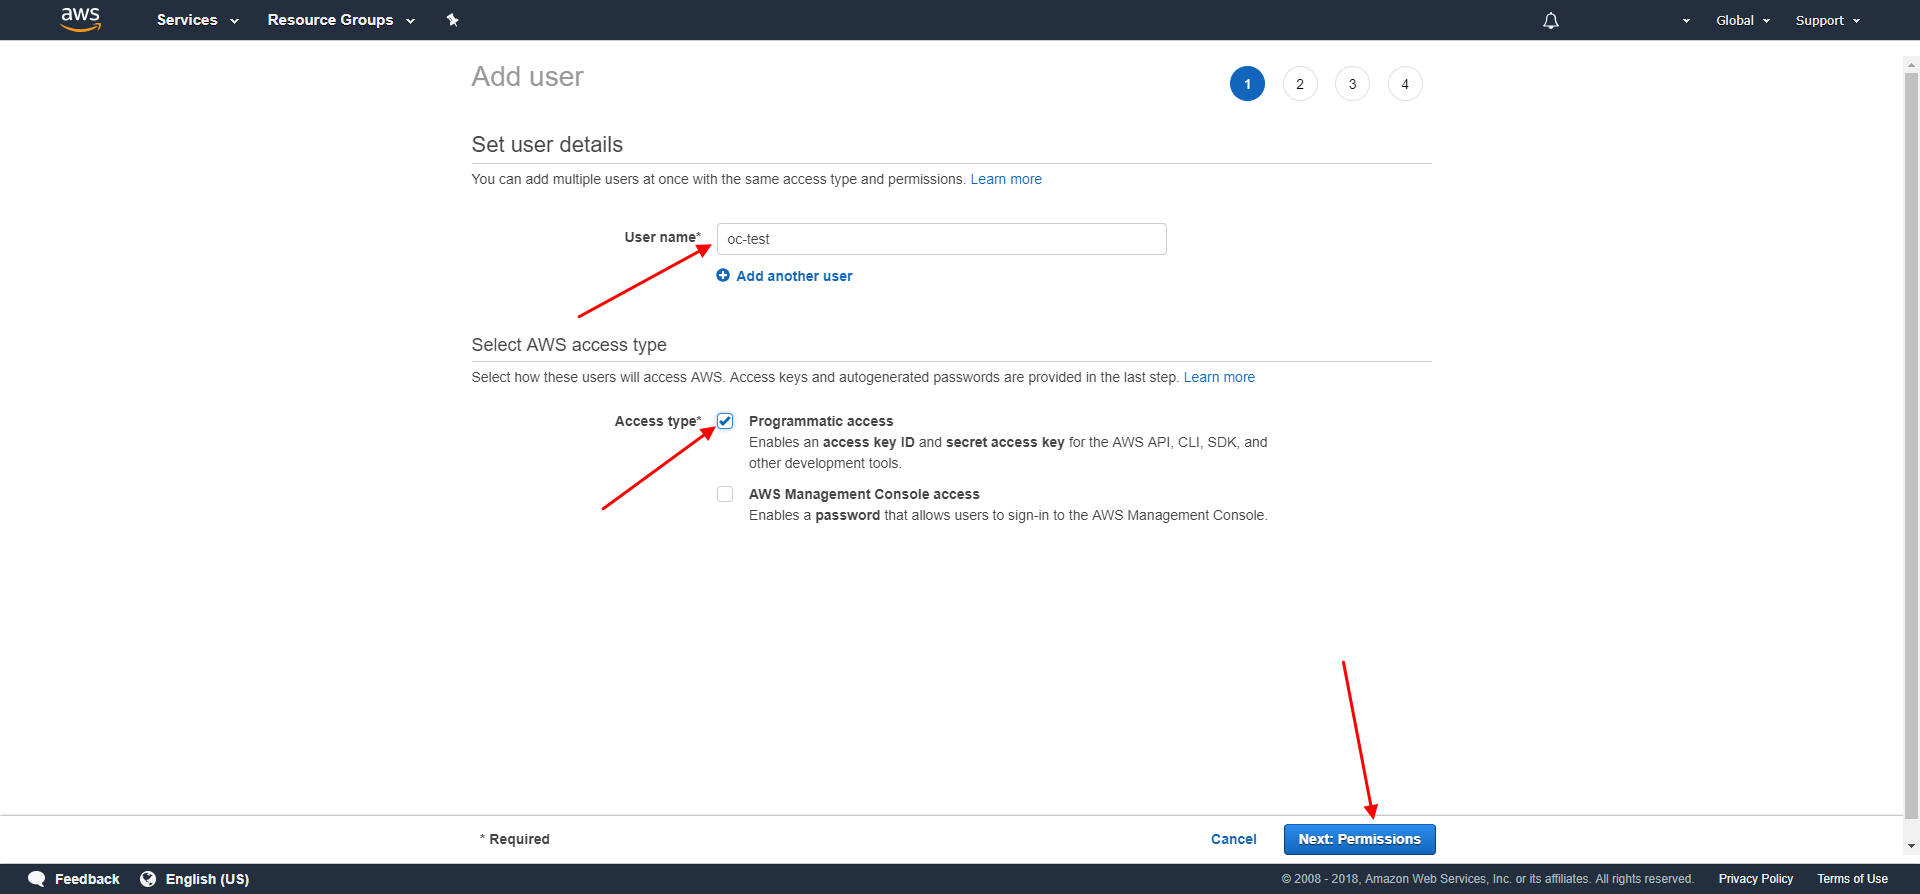
5.4. Choose a name for the user and tick the box next to “Programmatic access”
5.5. Click on “Next: Permissions”
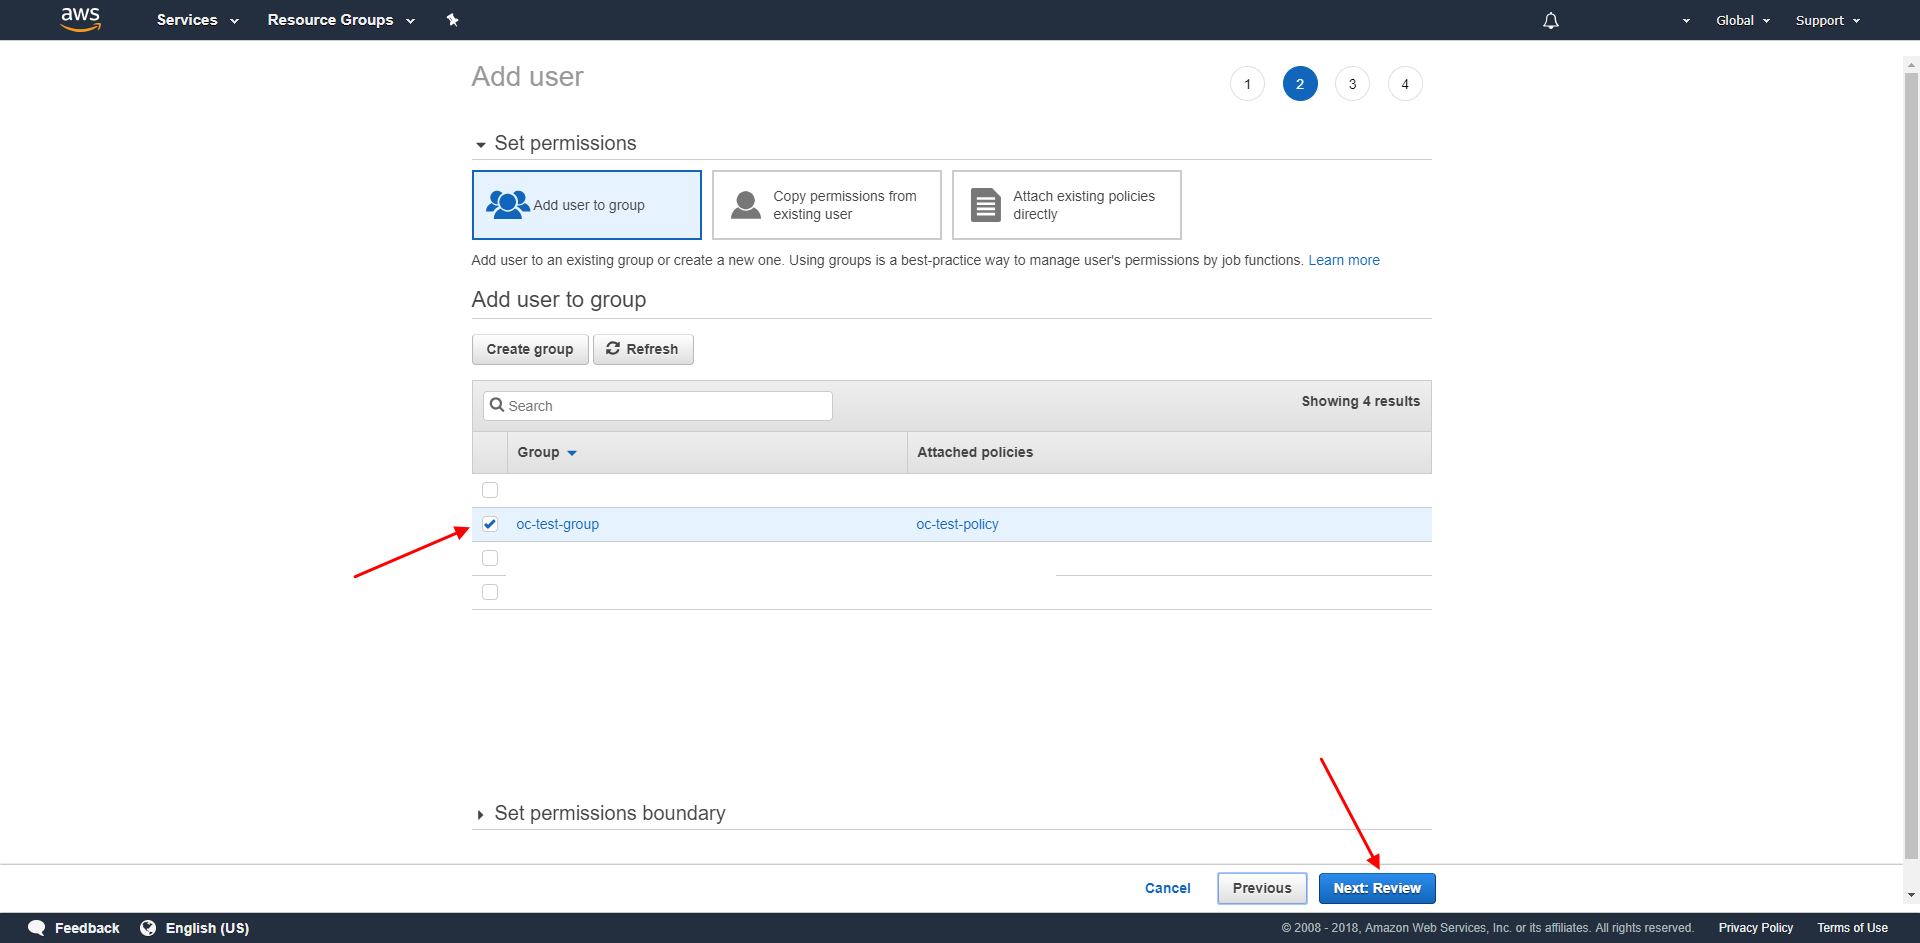
5.6. Select the group you just created, then click on “Next: Review”
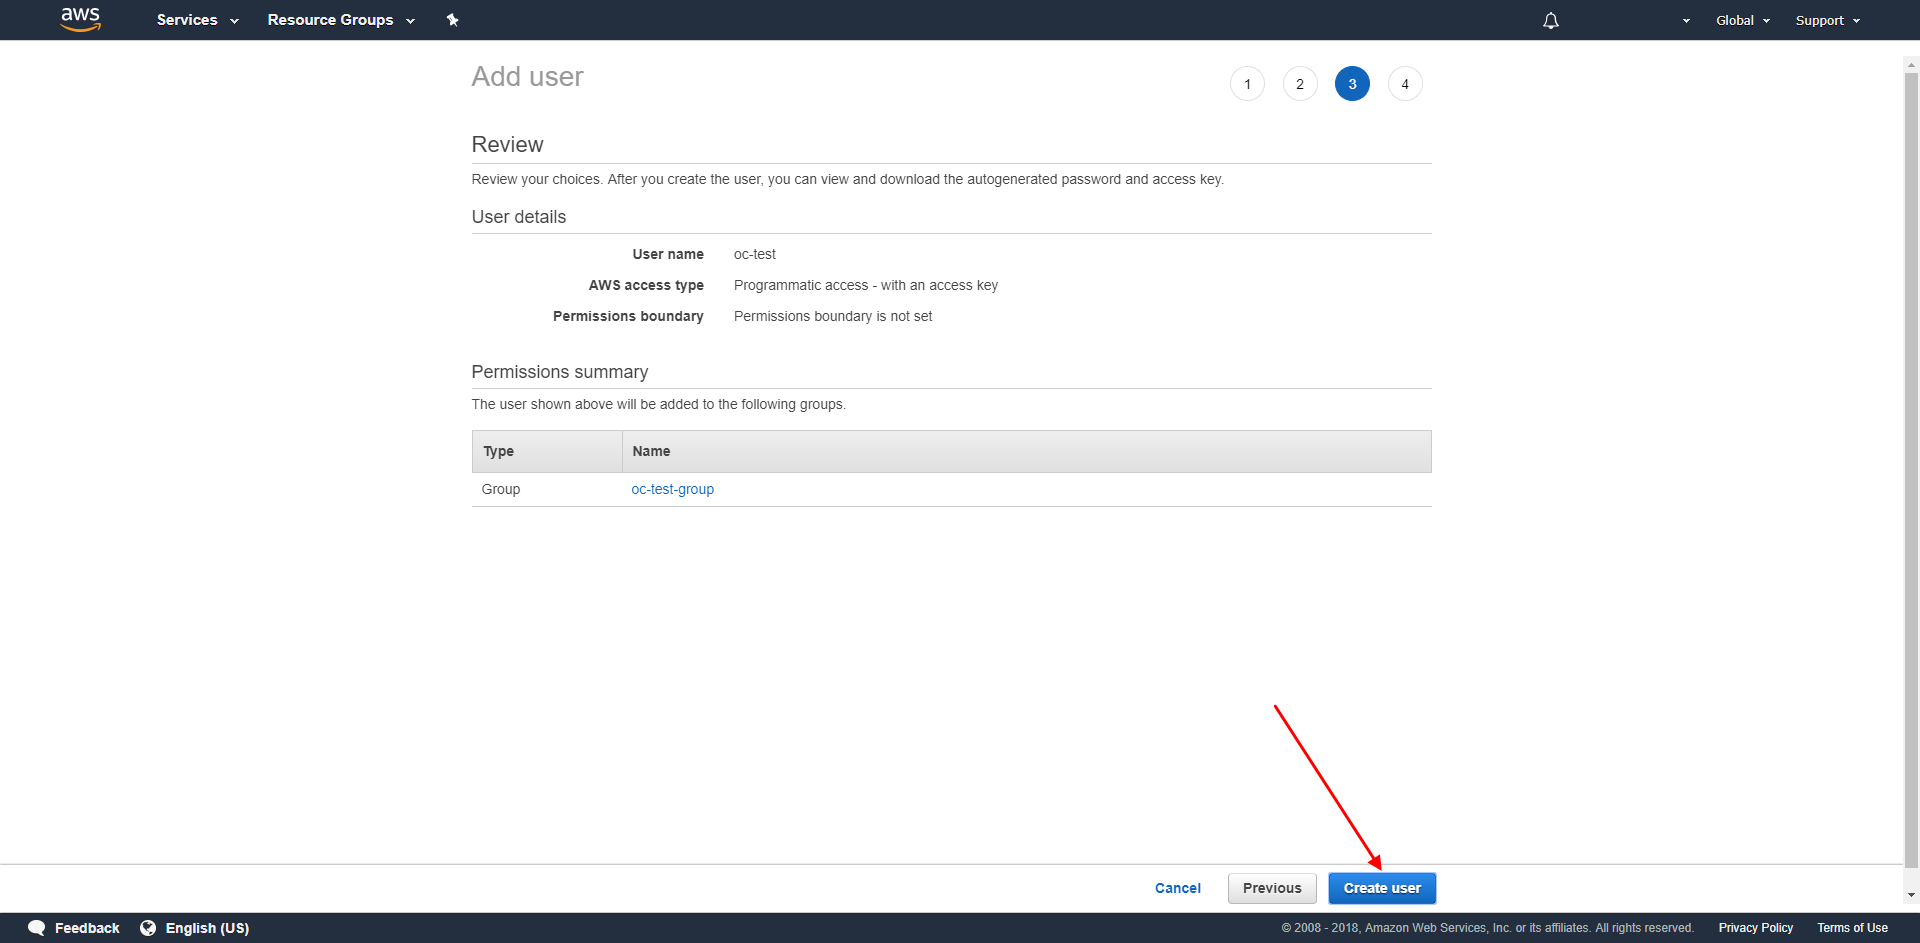
5.9. Review the information and click on “Create user”
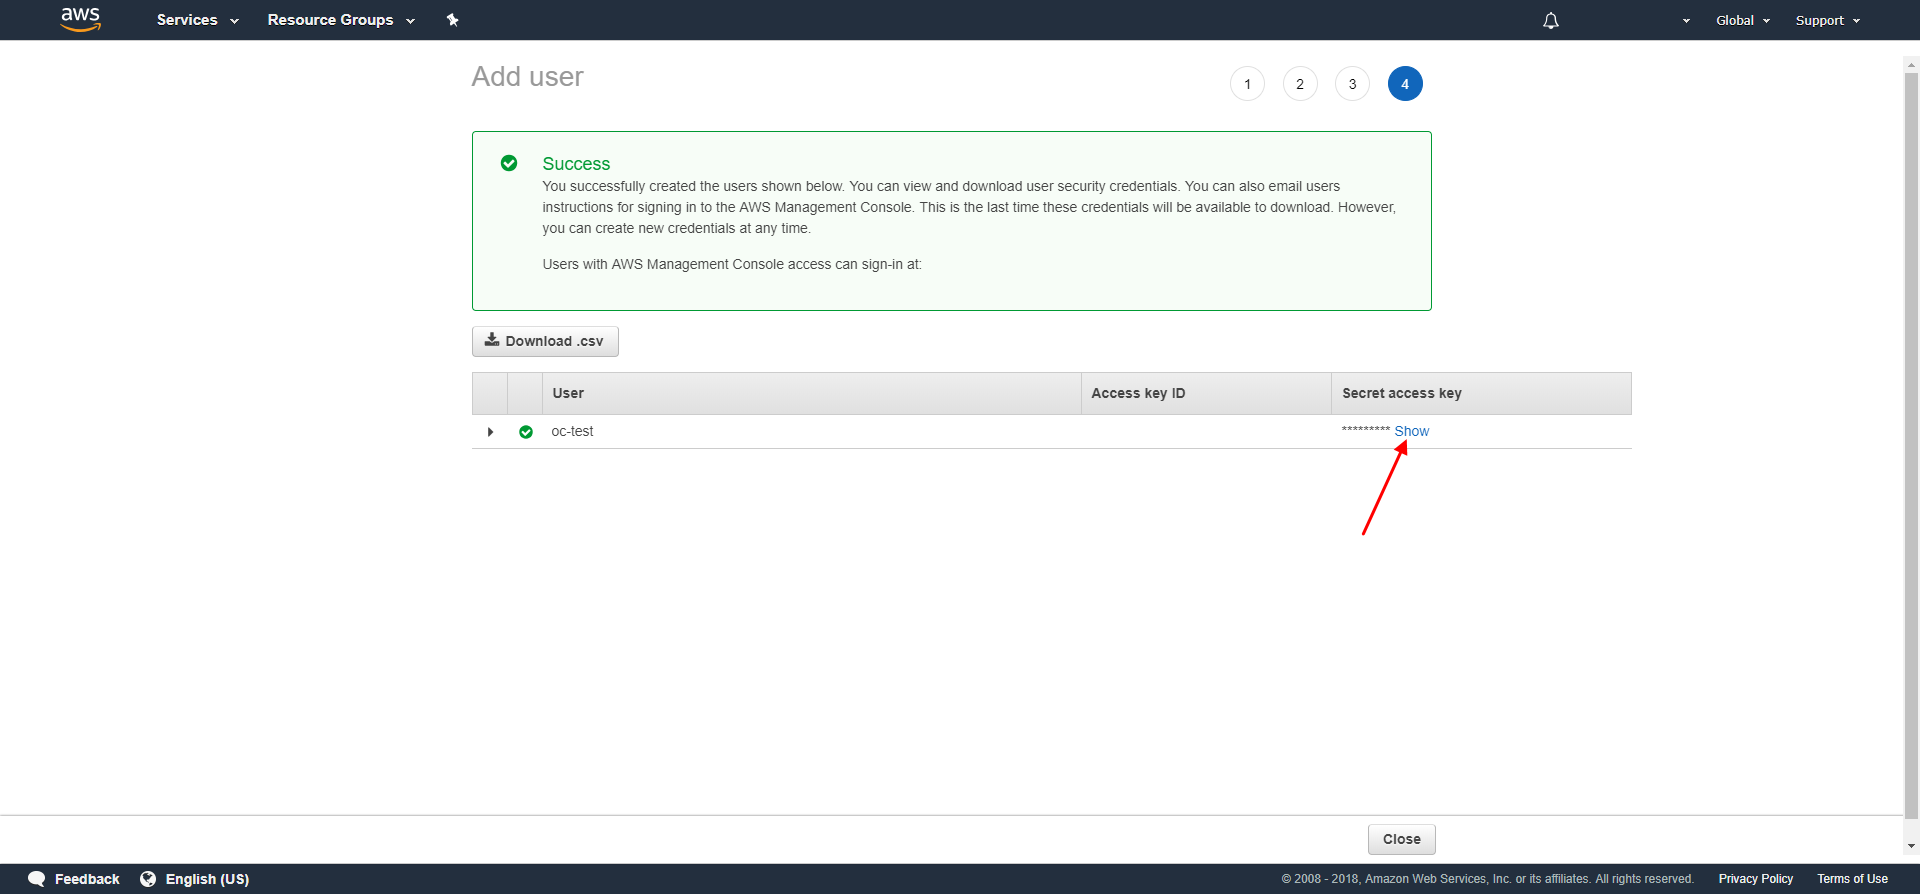
6. Get your secret access key by clicking on “Show”
Save this key for usage together with the Access Key ID – there is no way to retrieve this particular Secret Access Key later. You can create a new Access Key ID and Secret Access Key anytime though.
Save Files On Amazon S3
Now that your Amazon Web Service account, all users, groups, and policies are set up, you can start using it together with the Online Convert API. We will be using Postman for our examples below.
Check out our tutorial on how to use Postman or our YouTube tutorial.
First, let’s have a look at how to save converted files in your Amazon S3 bucket.
1. Use the following Postman POST command
{
    "input": [{
    "type": "remote",
    "source": "https://static.online-convert.com/example-file/raster%20image/jpg/example_small.jpg"
    }],
    "conversion": [{
        "category": "image",
        "target": "png",
        "output_target": [{
            "type": "amazons3",
            "parameters": {
                "bucket": "your bucket name",
                "file": "name for your file"
            },
            "credentials": {
            "accesskeyid": "your access key id",
            "secretaccesskey": "your secret access key"
            }
        }]
    }]
}
2. Add the necessary information
bucket: the name of your bucket
file: the name you want your file to be saved as
accesskeyid: Access Key ID of your user
secretaccesskey: Secret Access Key of your user
If you lost your Secret Access Key, you have to create a whole new set of Access Key ID and Secret Access Key.
3. Send the POST
4. Now your file will be saved in the Amazon bucket
Convert From Amazon S3
Of course, you can also convert files you have stored in your S3 bucket directly. Following, we’ll explain how to do this.
1. Use the following Postman POST command
{
    "conversion": [
        {
            "target": "png"
        }
    ],
    "input": [{
    "type": "cloud",
    "source": "amazons3",
    "parameters": {
            "bucket": "your bucket name",
            "file": "path to the file you want us to download"
        },
        "credentials": {
            "accesskeyid": "your access key id",
            "secretaccesskey": "your secret access key"
        }
    }]
}
2. Add the necessary information
bucket: the name of your bucket
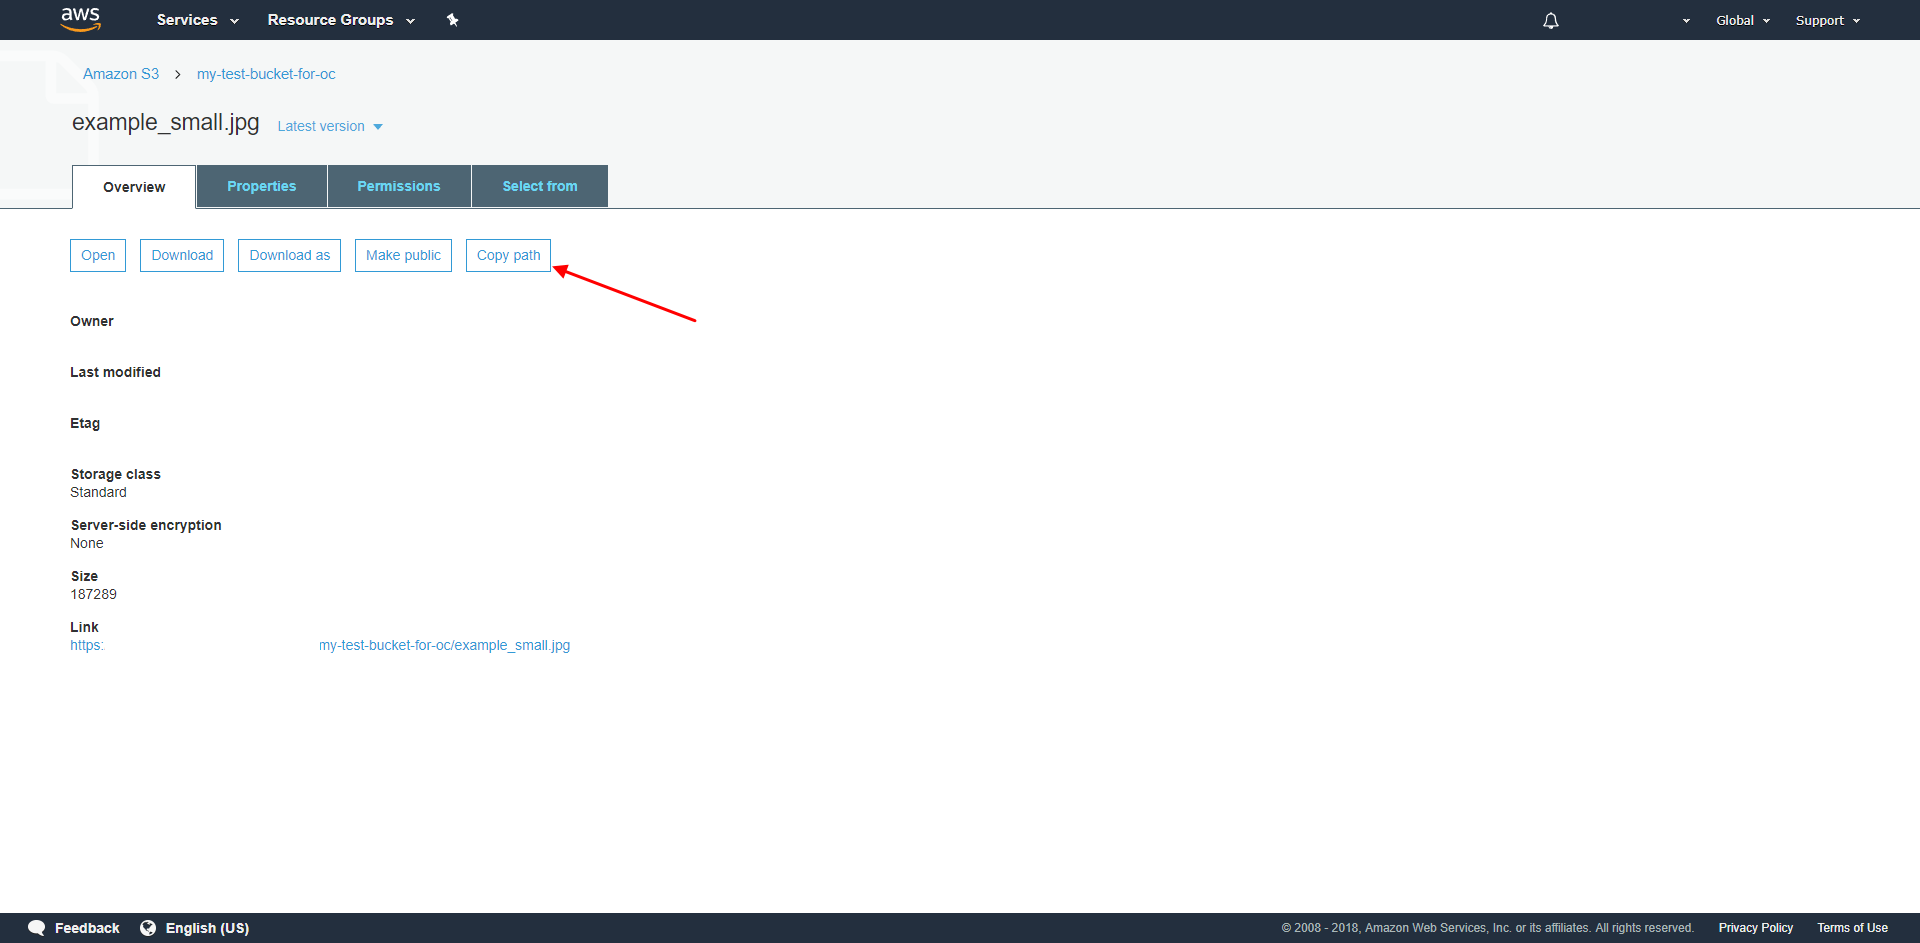
file: in the bucket, you can copy the path to your file
accesskeyid: Access Key ID of your user
secretaccesskey: Secret Access Key of your user
If you lost your Secret Access Key, you have to create a whole new set of Access Key ID and Secret Access Key.
3. Send the POST
Convert Files From & Save Them On Amazon S3
Of course, you can also combine the two API calls from above. Below, we used an Amazon S3 file and converted it. In the same step, we saved it in our Amazon S3 bucket.
1. Use the following Postman POST command
{
    "input": [{
    "type": "cloud",
    "source": "amazons3",
    "parameters": {
            "bucket": "your bucket name",
            "file": "path to the file you want us to download"
        },
        "credentials": {
            "accesskeyid": "your access key id",
            "secretaccesskey": "your secret access key"
        }
    }],
    "conversion": [{
        "category": "image",
        "target": "gif",
        "output_target": [{
            "type": "amazons3",
            "parameters": {
                "bucket": "your bucket name",
                "file": "name for your file"
            },
            "credentials": {
            "accesskeyid": "your access key id",
            "secretaccesskey": "your secret access key"
            }
        }]
    }]
}
2. Add the necessary information
3. Send the POST
4. Now your file will be saved in the Amazon bucket