Have you ever went on a vacation and took pictures that look weird? The colors of objects just seem off. People’s skin appears greenish, greyish, and any other “ishes.” It’s the same thing with other objects in the photographs.
The main culprit of such phenomena is an improper white balance.
Understanding white balance and its importance is one of the many basic skills beginner photographers must master right after ISO, shutter speed, and aperture. But first, let’s talk about what balance really is.
What is White Balance in Photography?
White balance is the photography term for adjusting colors so the photos look natural with colors matching real life.
Why is White Balance Important?
The way the sensor in your camera decodes color is different from the way our eyes see it. To add to the problem, different cameras have sensors made by different manufacturers. Each has their own algorithm to work with colors.
Since white balance influences all the images you take, getting it right before taking the pictures is crucial. That is if you want to preserve the colors exactly like what your eyes see them.
What is Color Temperature?
Color temperature is the color of the light source. You can see it clearly with halogen and fluorescent lights.
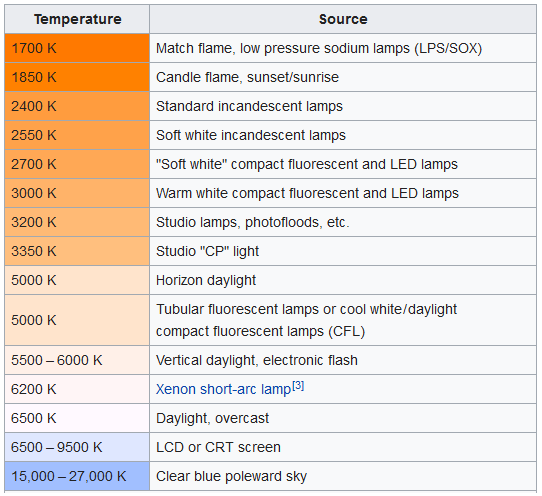
Under halogen lights, objects will look more orange while fluorescent gives off more blue.
“Orange and blue?”
Yes, when talking about white balance, many photographers tend to care more about those two even though the lighting source may produce other tints. Orange makes the picture look warm and blue makes it look cool. So when a photographer says the images you take look cool, it may not be a praise. He could be saying that the images are bluish.
How Do I Set White Balance on My Camera?
Different cameras have different ways to adjust white balance. Some have it hidden under layers of menus while other have programmable buttons. Consult your camera user manual and look for “White Balance” in the table of contents. Or play around with your camera for a bit and look for something like this:
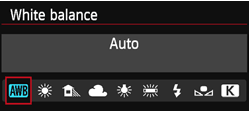
That’s how it looks like on Canon EOS 6D. You can set to Automatic White Balance (AWB), which is also the default in any camera brand, select from a number of presets (Daylight, Shade, Tungsten, Fluorescent), or set the temperature manually in Kelvin (the unit measurement for the temperature of light).
“Set the temperature manually?”
Yes, in an environment where none of the presets seem to give you the right color, you will need to set the color temperature manually. To do that, you just point at an object with neutral colors and correct the resulting image until it gives equal RGB (Red, Green, Blue) values.
Since such an object may not be so conveniently present during the shooting, many photographers carry a set of neutral color cards like this:
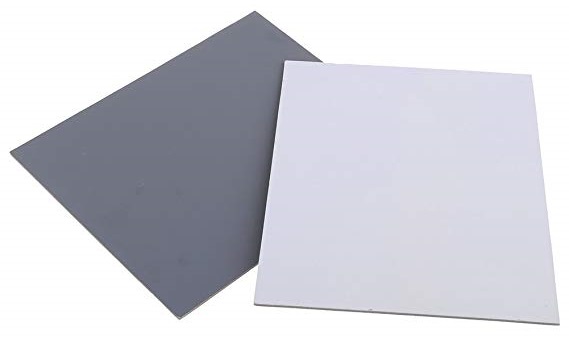
Shoot the card under the same lighting you’re planning to work with and use the image as the reference point. In post processing, sample the center of the gray card, get the white balance right, and copy the white balance setting to all of your images taken under the same lighting.
As a safety measure, just remember to use RAW format when taking pictures. You have plenty of leeways when you shoot RAW. You can fix many white balance imperfections in post processing without compromising quality. Why? Because all the pixel information is stored as is. There’s to preset or compression applied.
To convert your RAW images into more workable formats, head over to the online image conversion tool. You can upload the RAW images from your computer or from online storages. It’s easy and free.