Discover 25 invaluable Midjourney tips for beginners to maximize your AI image generating experience. From crafting captivating prompts to unlocking the platform’s full potential, these tips will transform you into a Midjourney Pro.
Let’s dive in and create some stunning images!
1 Adjust Default Account Settings
One of the essential tips for optimizing your Midjourney experience is to adjust your default account settings. This seemingly simple step can greatly enhance your prompt generation process. When starting out, many users may not be aware that they can customize their default parameters.
To do this, simply enter the command “/settings” in your Discord chat. A menu with various settings options will appear, allowing you to make adjustments according to your preferences.
Within the settings menu, you will find a range of parameters to explore.
If you are concerned about using up your fast hours, you can switch to “relax mode,” ensuring that all your images are automatically generated with the relaxed mode setting.
2 Change Your Aspect Ratios
The second tip for optimizing your Midjourney prompts is to utilize the “–ar” parameter to adjust your aspect ratios for specific images. By modifying the aspect ratio, you can transform the visual composition and perspective of your generated images.
To implement, simply add the command “–ar” followed by the desired aspect ratio.
For instance, “–ar 16:9” will generate images with a wide rectangle aspect ratio, perfect for cinematic shots. Conversely, using “–ar 9:16” will create vertical images, offering a unique perspective.
Changing the aspect ratio might seem like a small adjustment, but it introduces a whole new dimension to your prompt outcomes.
3 Blend Multiple Images
Another valuable tip is to utilize the “/blend” command to blend multiple images together. This feature allows you to combine different visuals, creating unique and imaginative compositions.
To begin, type “/blend” in your Discord chat. You will then have the option to upload two images that you wish to blend. After uploading the two images, you can even add three additional images and specify their dimensions.
Once you have selected the images, go ahead and send the prompt to Midjourney for blending. The algorithm will seamlessly merge the chosen visuals, resulting in a composite image.
4 Adjust the Chaos Parameter
Consider adjusting the chaos parameter to enhance the variation of initial images in the grid. By manipulating the chaos parameter, which ranges from 0 to 100, you can control the degree of diversity among the initial set of images that appear.
When the chaos parameter is set to a low value, such as 0, the initial four images within the grid will be quite similar to each other. However, if you increase the chaos parameter to its maximum value of 100, the initial images will exhibit a significant amount of variation.
To adjust the chaos parameter, simply use the command “–c” followed by a space and the desired value.
5 Create Seamless Patterns
Our Midjourney tip number five introduces a powerful feature that enables you to effortlessly create seamless patterns using the “/tile” parameter. Seamless patterns are invaluable for various applications, including selling patterns on platforms like Etsy, designing t-shirts, or creating captivating backgrounds and wallpapers.
To transform a regular pattern into a seamless one, start by typing out your prompt. For example, “pattern of computers, cartoon style, doodles.” Next, add “–tile” to the prompt. This command instructs Midjourney to generate a seamless pattern based on your input.
Once you have generated your patterns, you can browse through them and select the one that best suits your vision.
To ensure the seamlessness of your pattern, you can use a seamless texture checker available online. Simply paste your pattern into the checker, and it will verify if the pattern seamlessly repeats.
6 Adjust the Stylize Parameter
The “stylize” parameter allows you to adjust the default style strength, determining the balance between adherence to the prompt and creative exploration.
When the stylize value is set to zero, Midjourney closely follows the provided prompt, resulting in a more faithful representation. On the other hand, increasing the stylize value, such as to a thousand, introduces more artistic freedom and creativity, potentially deviating further from the initial prompt.
For instance, a “–stylize 500” strikes a balance between adherence and artistic exploration.
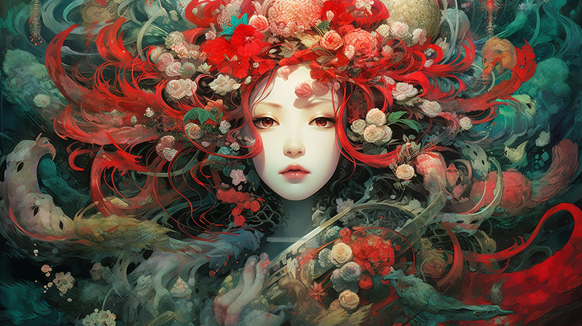
7 Niji Model (Anime-Styled Images)
Do you like Anime? Anime illustrations? The Niji model is a powerful tool for generating Anime-styled images. To access the Niji style, you can add “–niji” at the end of your prompt. Alternatively, you can go to the settings and select the Niji version to ensure all your prompts generate high-quality Anime-styled images.
By leveraging the Niji model, you can create stunning and authentic Anime-style illustrations that capture the essence of this beloved art form. The generated images exhibit the distinctive characteristics of Anime, including vibrant colors, expressive features, and captivating visual storytelling.
8 Use Multi-Prompt Commands
The concept of multi-prompt commands, allows you to separate and emphasize different elements within your prompts. By utilizing this feature, you can refine and specify the relationships between various objects, concepts, or actions in your generated images.
To illustrate this, let’s consider a basic prompt like “cupcake illustration.” By using a double colon (::) between “cup” and “cake” (cup::cake), you can indicate that you want an illustration of a cup and a separate illustration of a cake.
This command provides more precise instructions to Midjourney and influences the composition of the generated image.
9 Midjourney Negative Prompts
The “–no” parameter allows you to use negative prompting to remove specific items or colors from the generated image.
For example, if you want a vibrant landscape with a colorful flower field but do not want any yellow in the picture, you can use the command “–no yellow” in your prompt. This prompts Midjourney to exclude any yellow objects or colors from the image.
Negative prompting can be used not only for colors but also for other objects you want to exclude. It provides a useful way to refine the content of the generated image according to your preferences.
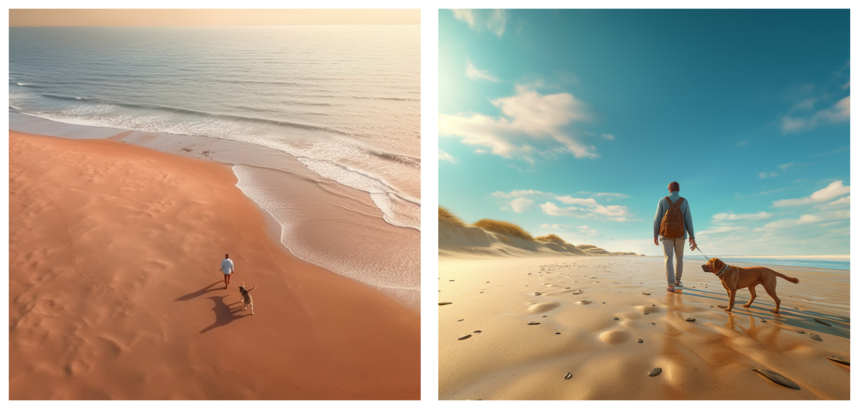
10 Specify the Perspective
By specifying the perspective type in your prompt, you can guide Midjourney to generate images from the desired viewpoint.
For example, if you want to get an aerial view of a photorealistic man walking on a windy beach, you can include the instruction “aerial view” in your prompt. You can also use the “drone angle” or “drone shot” in your prompt. Or include the “bird eye angle”. This tells Midjourney to generate the image from an above viewpoint.
Similarly, you can use terms like “worm’s eye view” to indicate a perspective from below. Specifying the perspective type allows you to control the composition and visual impact of the generated image.
11 Specify the Lighting Conditions
You can add specific lighting conditions to your prompt to guide Midjourney in generating images with the desired lighting effects.
If you want a photorealistic scene of a girl sitting in the park with a golden hour lighting ambiance, you can include the term “golden hour” in your prompt. This helps Midjourney understand your intent and generate an image that captures the specific lighting conditions.
By specifying lighting conditions, you can enhance the mood, atmosphere, and overall visual appeal of the generated images.
The most popular Midjourney lighting conditions include: Torchlit, Shimmering Light, Rim Lighting, Nightlight, Moody Lighting, Midnight, Fluorescent, Floodlight, Dusk, Dramatic Lighting, Dawn, Crepuscular Rays, Cinematic Lighting, Blue Hour, Beautiful Lighting, Backlighting, Golden Hour.
12 Specify the Color Palette
Select a specific color palette that you want Midjourney to use when generating the image. This can be done by choosing a color palette from your template or by specifying the desired colors directly in your prompt.
For example, you can include the instruction “earth tones color palette”, “rustic autumn palette” or “pastel color palette” in your prompt to guide Midjourney in using those specific color schemes.
13 Indicate the Mood
You can easily add instructions regarding the mood you want to convey in your prompt.
For example, include terms like “serene mood,” “mysterious mood,” “calm mood,” etc. This helps Midjourney understand the emotional atmosphere you want in the generated image.
14 Midjourney: Image Composition
Specifying the image composition allows you to control the placement and arrangement of elements within the image, enhancing its overall visual impact.
One popular composition technique is the rule of thirds, which divides the image into a grid of nine equal parts. You can include the instruction “rule of thirds” in your prompt to guide Midjourney in placing the subject of the image off-center, following the rule of thirds composition. This adds visual interest and balance to the image, creating a more dynamic and aesthetically pleasing composition.
Additional composition techniques you can specify in Midjourney prompts: symmetry, dynamic symmetry, vertical lines, fill the frame, negative space, etc.
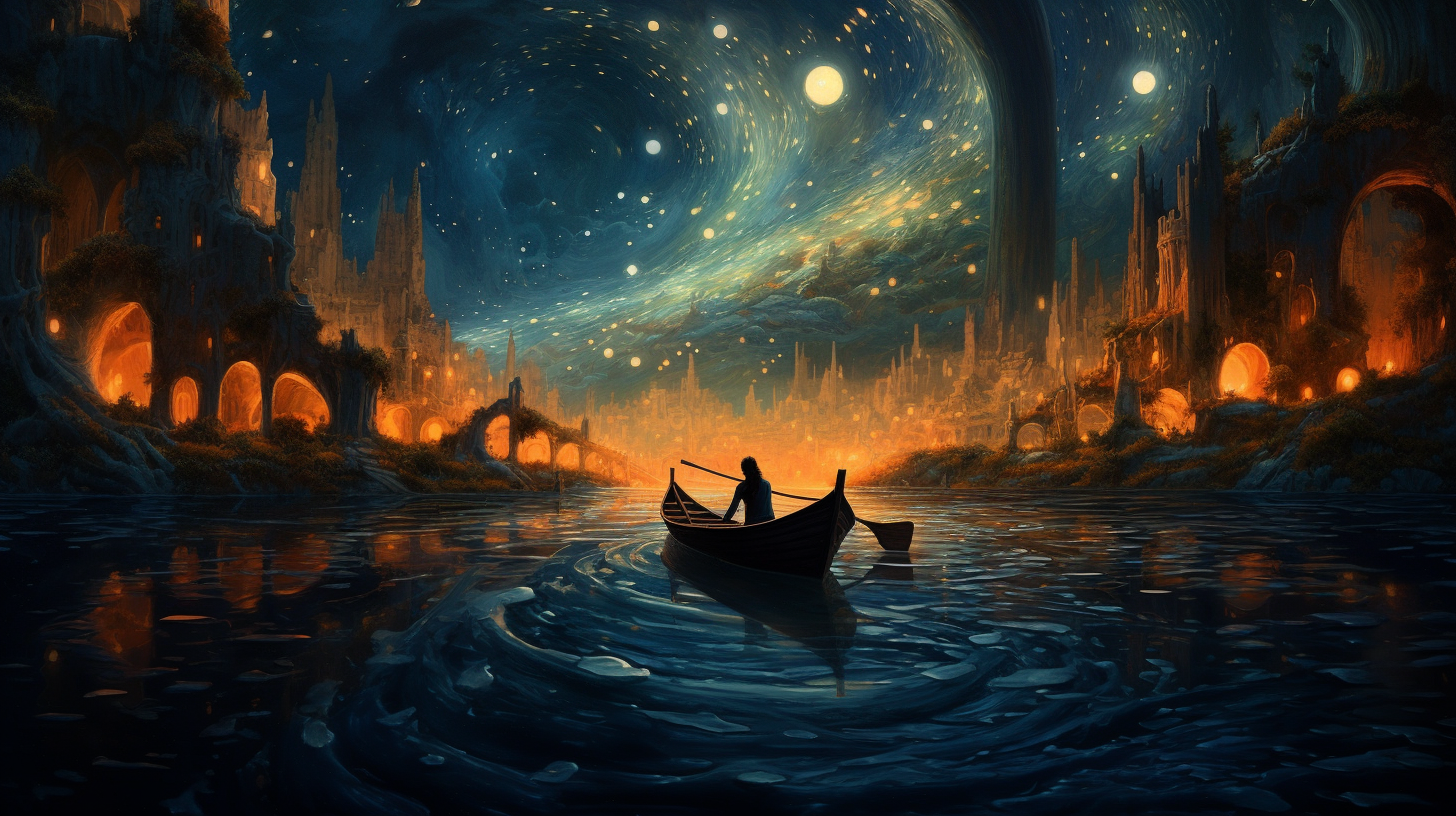
15 Use Famous Artworks in Your Prompts
This can be a great way to spark creativity and generate unique images!
Here’s how you can incorporate famous artworks into your Midjourney prompts:
- Pick a famous artwork that you find inspiring or intriguing (“The Starry Night” by Vincent van Gogh, “Mona Lisa” by Leonardo da Vinci, “The Scream” by Edvard Munch, “The Persistence of Memory” by Salvador Dalí, etc.)
- Think about how you can add your own creative twist to it. Consider incorporating elements, themes, or concepts that interest you or align with your artistic vision.
- Construct your prompt by mentioning the artwork you have chosen and describing the specific twist or modification you want to see.
- Submit your prompt. The AI model will interpret your instructions and generate an image that combines the essence of the famous artwork.
16 Mention Camera Settings
By specifying desired camera settings in your prompt, you can guide Midjourney to generate images that mimic the characteristics of real-life photography. Camera settings such as focal length, aperture, camera model, lens type, and even film types can significantly impact the visual outcome of the generated images.
For example, if you want a hyper-realistic image with a shallow depth of field and high-quality details, you can mention specific camera settings like using a Nikon D850 with an 85mm lens and an aperture of f/1.8.
On the other hand, if you desire a vintage or film-like effect, you can mention using a film camera such as the Kodak Ultra F9, adding some film grain, and specifying the desired aesthetic.
You can also adjust its ISO number (“–ISO 100) which is an indicator of how sensitive the color film is to light, from ISO 100 to 3200.
17 Use collective nouns and specific numbers in your prompts
Applying this tip can help provide more precise instructions to Midjourney, resulting in more specific and accurate generated images.
Instead of using general terms, incorporate collective nouns to describe groups of objects or animals. For example, instead of “bird soaring in the sky,” you can use “a flock of birds gracefully soaring in the sky.” This provides Midjourney with a clearer understanding of your desired image and improves the chances of generating a more accurate representation.
Instead of using plural words, specify the exact number of objects or elements you want in your image. For instance, instead of requesting a generic “image of dogs,” you can be more specific and ask for a “hyper-realistic image featuring three dogs.”
18 Punctuation Can Not be Interpreted
This is an important tip to keep in mind! Midjourney does not reliably interpret punctuation marks such as periods, exclamation points, or question marks in your prompts. It focuses on the text itself and does not derive any specific meaning from the punctuation.
Therefore, when crafting your prompts, it’s best to avoid relying on punctuation to convey instructions or context. Instead, focus on providing clear and concise text instructions that Midjourney can understand and generate appropriate images based on the given information.
19 Upscale Your Images for Better Quality
Upscaling your images can significantly improve their quality! If you want to upscale a specific image, use the provided grid numbering to reference it.
For instance: to upscale the image in the top right corner of the grid, you can enter the command “U2” (U for upscale and 2 for the second image in the grid). This will quickly upscale the image and enhance its quality.
20 Use the Help Command
If you need assistance or guidance while using Midjourney in the Discord server, you can utilize the slash help command.
Simply type “/help” and press Enter. This command will provide you with various options and resources to learn more about Midjourney. You can explore the parameter list, access the getting started documentation, and find other valuable information to improve your understanding and usage of Midjourney.
21 Add an Image URL to Your Prompt
To include an image in your prompt, you can drag and drop the image file into the prompt box after typing the “/imagine” command. Alternatively, you can right-click and paste the image’s URL directly into the prompt box. This allows you to incorporate specific images as references or inspiration for generating the desired output.
After adding the image address, add any additional text and parameters to complete the prompt.
22 Use Remix Mode
Remix Mode is a powerful feature in Midjourney that allows you to change prompts, parameters, model versions, or aspect ratios between variations. By activating Remix Mode, you can alter and evolve your images in various ways, such as adjusting the setting, lighting, subject, or composition.
Here’s how to use Remix Mode:
- Activate Remix Mode: You can activate Remix Mode by typing the “/prefer remix” command or by accessing the settings with the “/settings” command and toggling the 🎛️ Remix Mode button. Once enabled, Remix Mode changes the behavior of the variation buttons (V1, V2, V3, V4) under the image grids.
- When Remix Mode is active, you can modify your prompt during each variation. This allows you to refine and experiment with different combinations and instructions to influence the generated output.
- Remix Mode also enables you to switch between different model versions. This gives you the flexibility to explore different AI capabilities and styles during the remixing process.
23 Midjourney Versions
Midjourney regularly introduces new model versions to enhance efficiency, coherence, and image quality. While the latest model (V5.1) is set as the default, you can select other models by utilizing the “–v” parameter in your prompt.
Alternatively, you can access the “/settings” command to choose a specific model version. Each model excels in generating different types of images.
24 Style Raw
Model Version 5.1 can be further customized using the “–style raw” parameter. This parameter reduces the influence of the default Midjourney aesthetic, giving users more control over their images or allowing for more photographic results.
Use the –style Parameter: Add –style (style name) to the end of your prompt to apply a specific style. For example, “–style raw” reduces the default aesthetic influence.
Use the Settings Command: Type /settings and select 🔧 Raw from the menu to append –style raw to all prompts.
25 Use Emojis for Quick Prompts
Using emojis in your prompts can add a fun and playful element. Here’s how you can incorporate emojis for quick prompts:
- Choose emojis that represent objects, concepts, or moods you want to include in your prompt. Emojis can range from simple objects like 🌞 (sun), 🍍 (pineapple), or 🌈 (rainbow) to expressive emojis like 😍 (heart eyes), 😄 (smiling face), or 😎 (cool sunglasses). Get creative and mix different emojis together to create unique combinations.
- Copy and paste the selected emojis into your prompt. You can use them alone or combine them with text to provide more context or instructions.
- Finally, submit the prompt.
Convert Your Images Online
Online Convert is a great tool to convert your PNG images generated by Midjourney into different formats, allowing you to seamlessly integrate them into your projects or share them across various platforms.
Take advantage of this convenient solution and let your creativity flow without any boundaries!
Conclusion
If you are someone wanting to explore Midjourney’s creative possibilities, by implementing these tips, you will be able to create unique and stunning visual compositions.
So, go ahead, experiment, and bring your artistic visions to life with just a few clicks!
TIP: Try the New AI Tool on Online Convert!
The Online Convert has its very own AI art generator, AI Creator Studio! This innovative tool allows you to turn your creative ideas into stunning artwork effortlessly.
Try It Out!
- Simple to Use: Just enter your prompt and select your preferred style and aspect ratio.
- Customize Your Vision: Use the Prompt Editor to refine your artwork by choosing various options like lighting, mood, and art style.
- Generate and Download: Click “Generate” to create your image, and once you’are happy with it, easily download your masterpiece.
Experience the perfect blend of technology and creativity with AI Creator Studio—your canvas for endless artistic possibilities!